

Working with Custom Report Policies in Netsparker
A Report Policy in Netsparker is a list of reporting settings for both the web security scan results and reports. A Custom Report Policy, therefore, enables you to configure these settings – how the web security scanner reports its findings in the interface and in reports. (If you want to enable or disable specific security checks in the actual Scan itself, you should configure a Scan Policy instead.)
When you exclude the SQL Injection vulnerability from a Report Policy and run a report, the scanner will still check if the target web application is vulnerable to this vulnerability. However, if it detects one, it won’t report it in the Scan Results. With the Report Policy, the SQL Injection is only hidden.
If you later generate a Report from the same Scan with the Default Report Policy, in which the SQL Injection vulnerability is included, the identified SQL Injection vulnerability will be listed in the report.
For example:
- You can specify which detected vulnerabilities Netsparker should report in the Scan Results
- You can also change the Severity level – or the visibility – of a vulnerability
Creating a Custom Report Policy
Netsparker Cloud’s built-in Report Policy is called Default Report Policy. It is read-only and it is used to provide the default settings for your custom Report Policies. You can clone existing Report Policies or create new ones, and then the new custom report policy modified to suit your requirements.
Two significant customisations are possible:
- Excluding a vulnerability from the web security Scan Report
- Changing the Severity Level of a vulnerability
Each is explained in Report Policy Fields below.
Report Policy Fields
This table lists and explains the fields in the New Report Policy window and how to exclude a vulnerability or how to change the severity level of a vulnerability.
| Fields | Description |
|
Name |
Enter a friendly name for the Report Policy. |
| Description |
Enter a simple description that will help you remember what it is for. |
| Title |
Using the checkboxes in this field, you can include or exclude a vulnerability from your web security scan report. When a vulnerability is unchecked in a Report Policy:
Highlighted rows indicate which the vulnerabilities have been excluded from the scan. |
| Severity |
Using the dropdowns, you can change the Severity level of each relevant vulnerability. Highlighted rows indicate which vulnerabilities have had their Severity Level amended. |
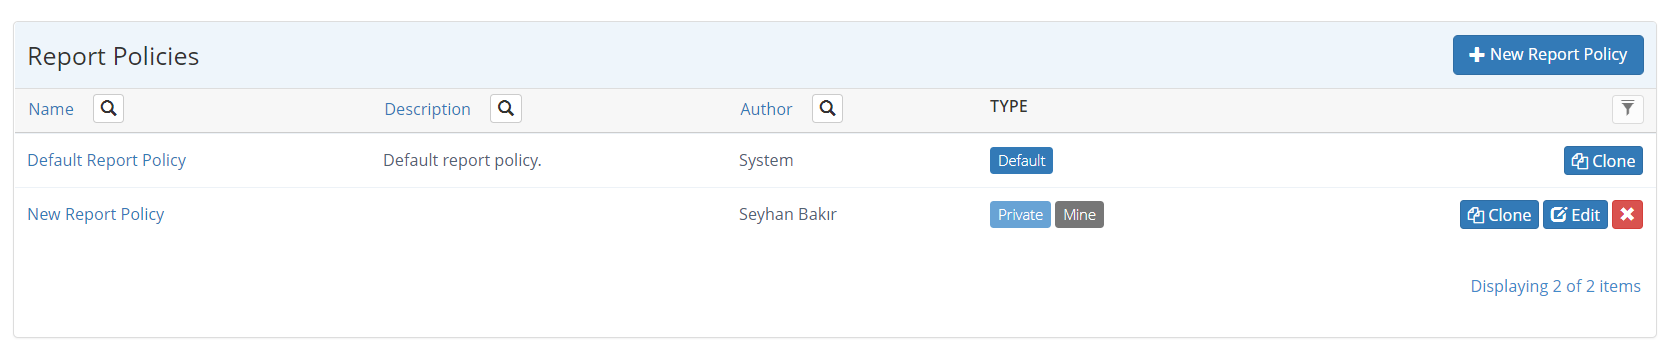
How to View Report Policies
From the main menu, click Policies, then Report Policies. The Report Policies window is displayed. From there, you can view, clone, edit or delete any listed policy.
How to Create a Custom Report Policy
- From the main menu, click Policies, then New Report Policy. The New Report Policy window opens at the General tab.

- In the Name field, enter a name for your report policy.
- In the Description field, enter a description for your report policy.
- Click the Vulnerabilities tab. The full list of vulnerabilities Netsparker scans for is displayed.

- Browse through the list of vulnerabilities and use the checkboxes to select or deselect the ones you want to include or exclude from your Scan Report. You can also use the input field at the top to search for a specific vulnerability.
- For reach vulnerability, use the dropdowns in the Severity column to change the Severity Level of each vulnerability, if required.
- Click Save.
How to Clone the Default Report Policy
- From the main menu, click Policies, then Report Policies.
- For the relevant policy, click Clone.
- Complete the fields as described from step 2 in How to Create a Custom Report Policy.
Using a Custom Report Policy
Once you have created a Custom Report Policy, you can use it when creating a New Scan, New Scheduled Scan or New Group Scan.
How to Use a Custom Report Policy in a Scan
- From the main menu, click Scans, the New Scan. The New Scan window opens at the General tab.
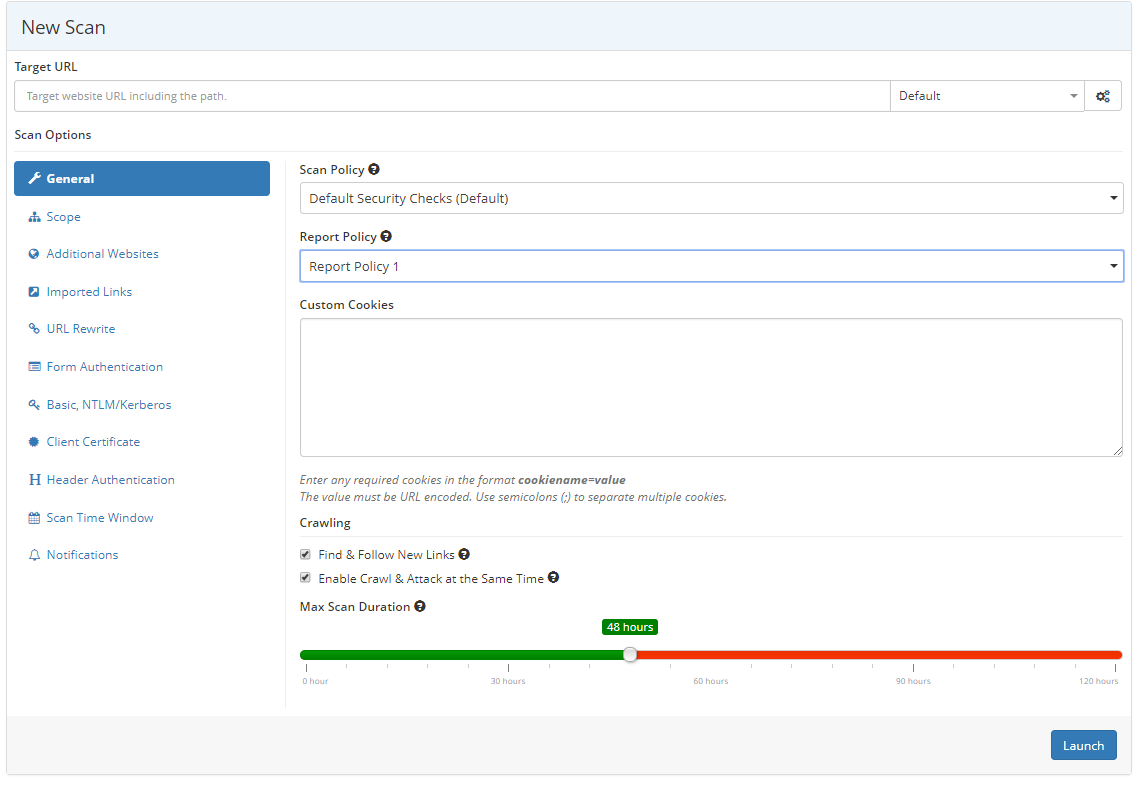
- From the Report Policy dropdown, select your Custom Report Policy.
- Complete the remaining fields as described in Security Scans.
*** This is a Security Bloggers Network syndicated blog from Netsparker, Web Application Security Scanner authored by Seyhan Bakir. Read the original post at: https://www.netsparker.com/blog/docs-and-faqs/custom-report-policies-netsparker/
