

Using SSO With Snowflake and Cyral
One use case we commonly see is protecting a Snowflake computing data warehouse with a Cyral sidecar. When configured to protect a Snowflake endpoint, the sidecar will have its own domain, like snowflake.example.com, that users and applications can use to access their Snowflake data through the sidecar.
This means that users accessing their Snowflake data warehouse through a browser would navigate to their sidecar’s domain instead of their *.snowflakecomputing.com domain. The sidecar flawlessly proxies Snowflake’s web interface with zero impact on the end user’s experience.
Another common use case we see is using an identity provider, like Okta, to authenticate with Snowflake through the web interface. Snowflake uses the SAML 2.0 protocol to establish a relationship between identity providers and your Snowflake account. To learn more about federated authentication in Snowflake, check out Snowflake’s documentation.
This blog post will provide details on how to configure Okta, Snowflake, and your Cyral Sidecar for using Okta to authenticate with Snowflake through the sidecar. The Cyral Sidecar supports the IdP-initiated login flow as well as the SP-initiated login flow. This means the user experience of using Okta to authenticate with Snowflake through the *.snowflakecomputing.com domain is identical to the experience of using Okta to authenticate with Snowflake through the sidecar’s domain.
Okta Configuration
To support using Okta when accessing your data through your *.snowflakecomputing.com domain as well as your sidecar’s domain, you’ll need to configure two custom SAML applications in your Okta account. First, we’ll create the SAML app for accessing Snowflake directly.
- Go to the Okta admin console using the Classic UI and click on the Applications tab.
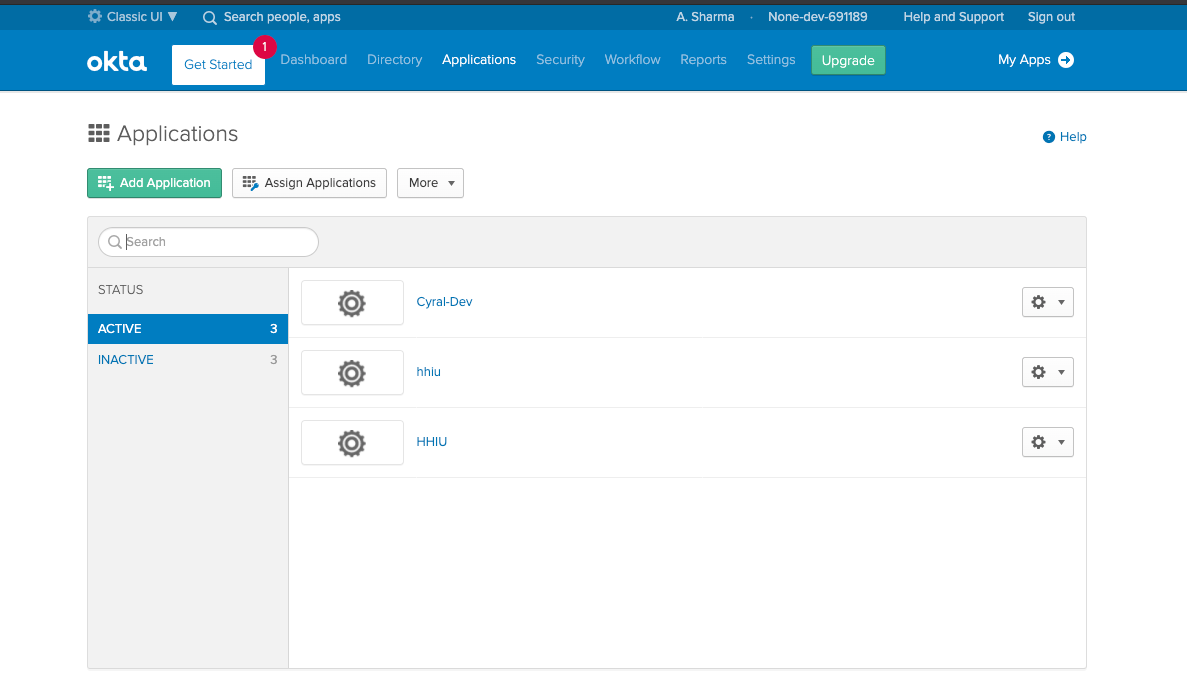
- Click Add Application, then Create New App. In the pop-up, select SAML 2.0 and click Create.
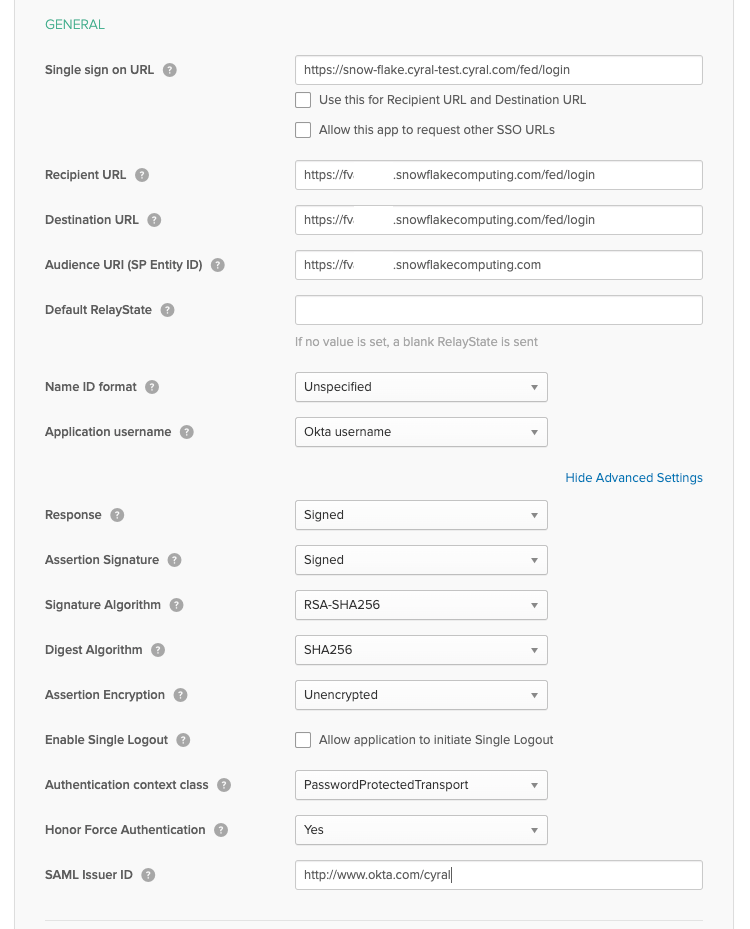
- We’ll configure the SAML app for direct access first. Fill in an App name then click Next. The App name can be whatever you want. We’re using Snowflake (Direct) for our example.

- You’ll need to fill out the Single sign on URL and Audience URI (SP Entity ID) fields. The first is the ACS URL, which is of the form https://<account_name>.<region>.snowflakecomputing.com/fed/login. Note that AWS-based Snowflake accounts in us-west-* don’t require region to be specified. The SP Entity ID is just your account URL without any URI, https://<account_name>.<region>.snowflakecomputing.com.
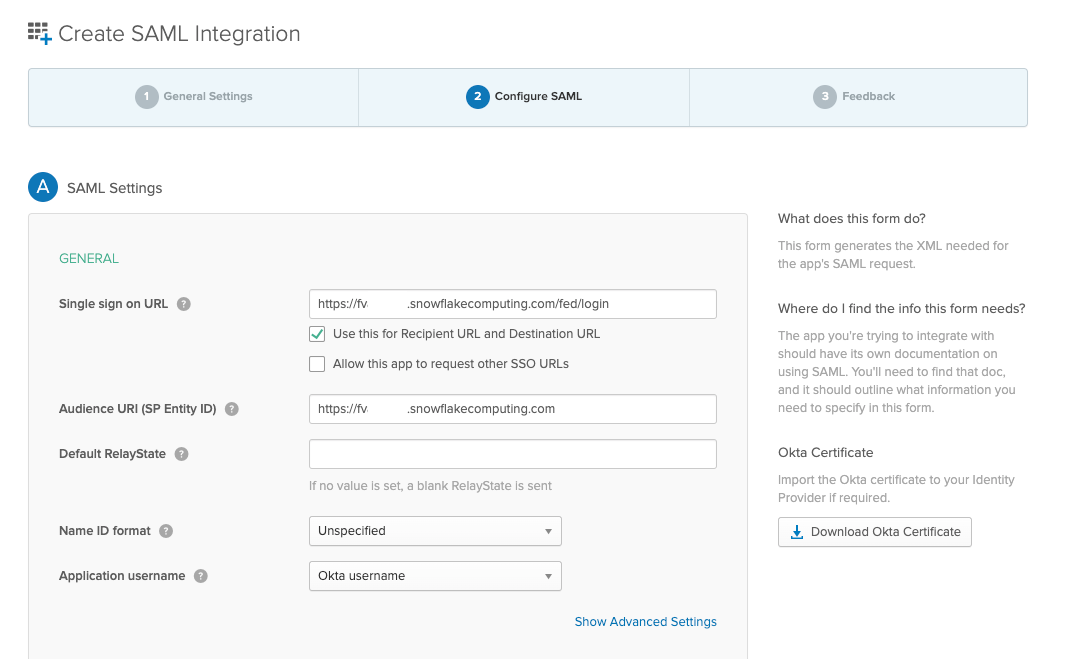
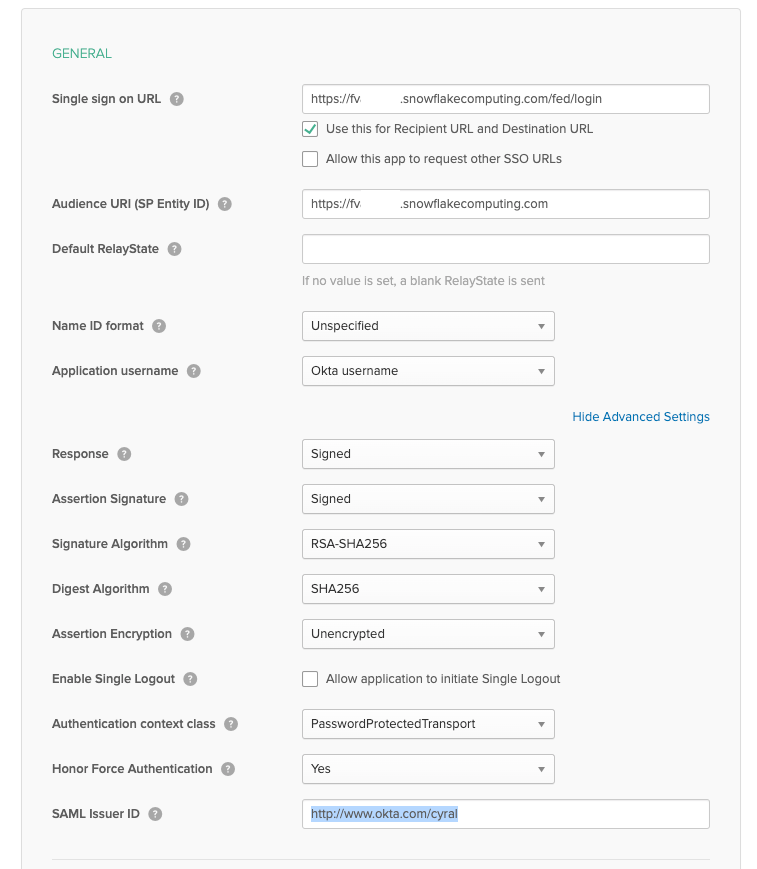
- Click on Show Advanced Settings. Here, you’ll need to specify a SAML Issuer ID. This Issuer ID needs to be the same between the two Snowflake SAML applications you create. The Issuer ID should be of the form http://www.okta.com/* to maintain consistency with with the typical Okta Issuer IDs. In our example we’re using http://www.okta.com/cyral. This is the only advanced option you need to configure for this application.
- Click Next, then select I’m an Okta customer adding an internal app and This is an internal app that we have created. These answers don’t impact the SAML configuration at all, it’s just the least amount of action required to get to the next screen. Click Finish.
- Perform steps 1-3 again for the Snowflake Sidecar SAML application. For our example, we’re using an App name of Snowflake (Sidecar).
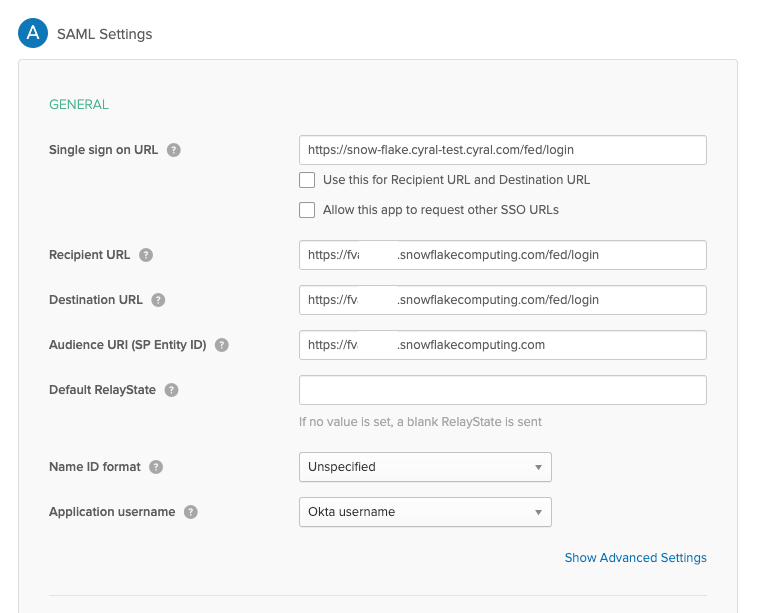
- Once you’re past the General Settings for the SAML app, uncheck Use this for Recipient URL and Destination URL under the Single sign on URL field. This will present two new configuration fields where we can specify a Recipient URL and Destination URL that differ from the ACS URL used in the Single sign on URL field. The Single sign on URL field should be https://<sidecar_domain>/fed/login. In our case, this is https://snow-flake.cyral-test.cyral.com/fed/login. The Recipient URL and Destination URL both follow the form of https://<account_name>.<region>.snowflakecomputing.com/fed/login. Lastly, the Audience URI (SP Entity ID) field just needs to be populated with your Snowflake account URL, https://<account_name>.<region>.snowflakecomputing.com.
- Next click on Show Advanced Settings. Under the advanced settings, you just need to specify the SAML Issuer ID. Note that this MUST be the same as the SAML Issuer ID you configured in the other SAML app. In our case, we used http://www.okta.com/cyral in the other app, so that’s what we use here.
- Click Next, then select I’m an Okta customer adding an internal app and This is an internal app that we have created. These answers don’t impact the SAML configuration at all, it’s just the least amount of action needed to get past this screen. Click Finish.
- Don’t forget, you’ll need to explicitly assign these two SAML apps to the Okta users that need to use them.
Snowflake Configuration
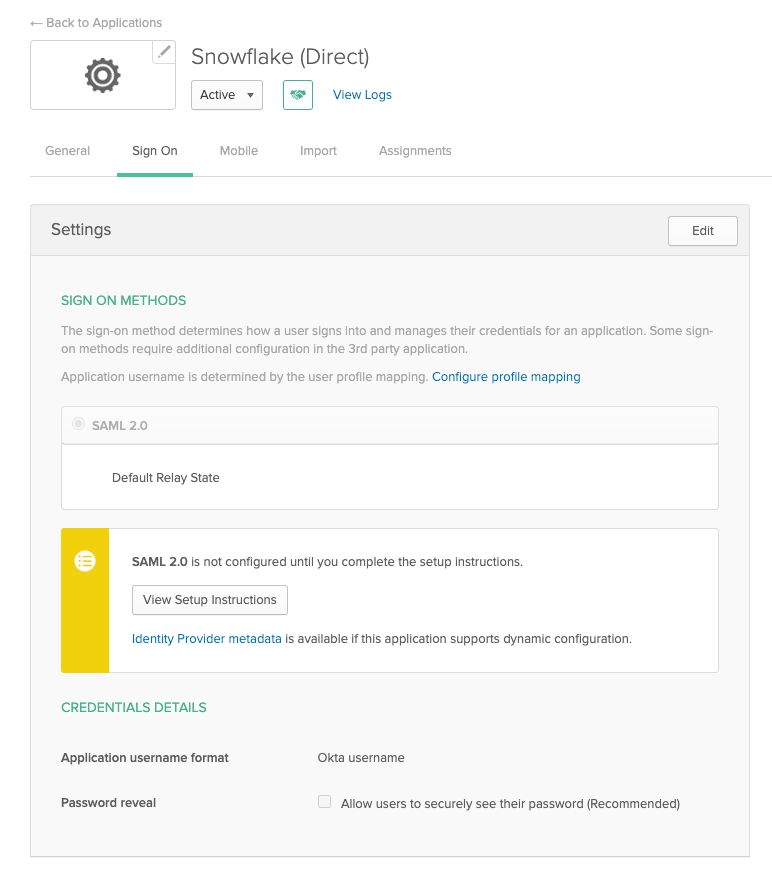
- You’ll need to get some information from the SAML applications you configured in Okta to properly configure the SAML_IDENTITY_PROVIDER property on your Snowflake account. In Okta, navigate to the SAML app you created for the Direct SSO case and click the Sign On tab. Then, click View Setup Instructions.
- Take note of these values, you’ll use the values from 1-3 to configure your Snowflake account’s SAML_IDENTITY_PROVIDER.
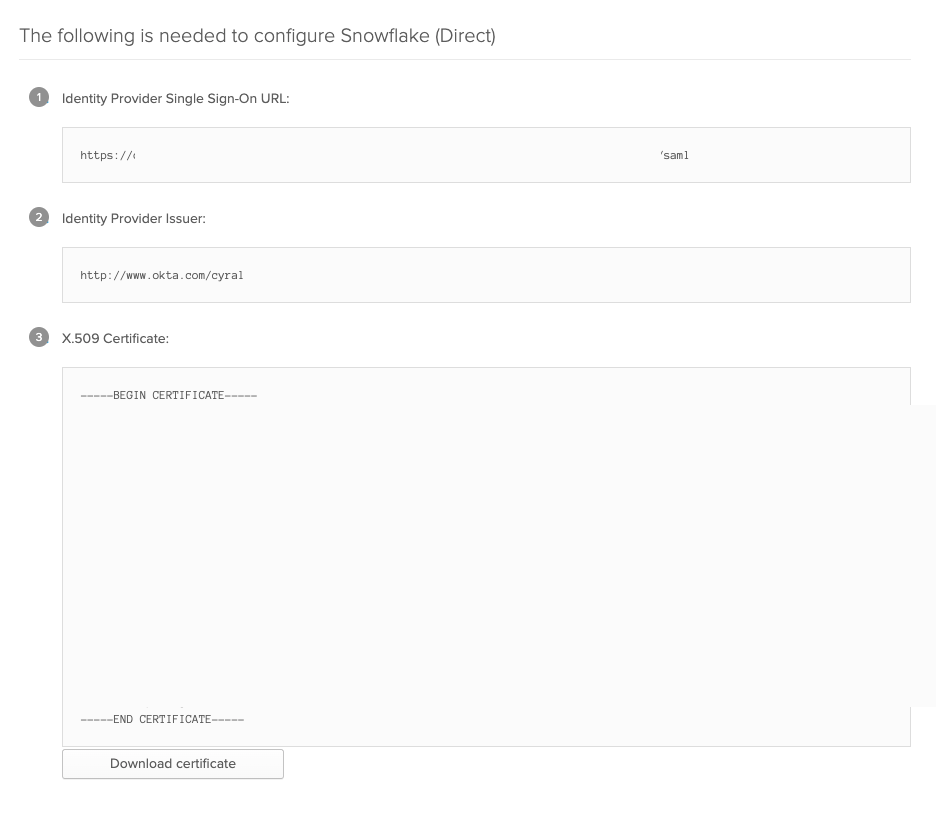
- Log in to Snowflake with a user that has the ACCOUNTADMIN or SECURITYADMIN role. You’ll need to execute the following Snowflake query:
alter account set saml_identity_provider = '{ "certificate": "<X.509 Certificate without -----BEGIN CERTIFICATE----- and -----END CERTIFICATE----- >", "issuer": "<Identity Provider Issuer>", "ssoUrl": "<Identity Provider Single Sign-On URL>", "type" : "OKTA", "label" : "<Whatever Label you want>" }';Once your query is set up, execute it.
- Once the SAML_IDENTITY_PROVIDER property is set on the account, you can enable the SSO login page with the following Snowflake query
alter account set sso_login_page = true;- At this point, using Snowflake SSO via Okta will work when accessing Snowflake directly. However, note that you’ll need to create users in your Snowflake account for each Okta user that will be using the SSO to access the Snowflake account (see step 2 in Snowflake’s Okta Setup documentation).
Cyral Sidecar Configuration
- Next, you’ll need to configure your Cyral Sidecar with some information from the other Okta SAML App you created.
- In Okta, navigate to the SAML app you created for the Sidecar SSO case and click the Sign On tab. Then, click View Setup Instructions.
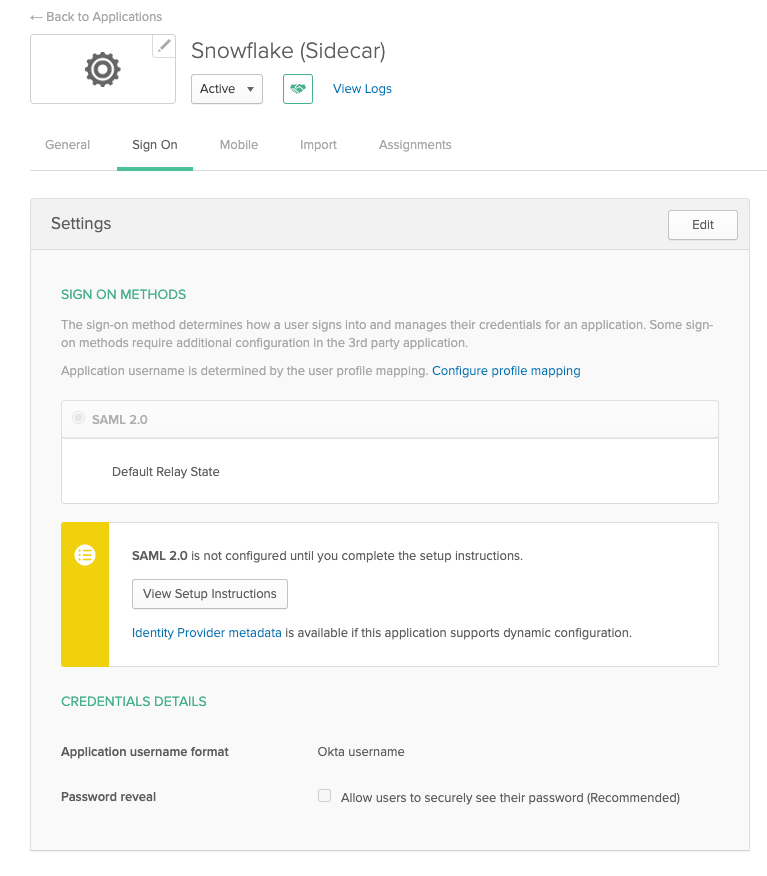
- Take note of all these values. You’ll notice that the Identity Provider Issuer and X.509 Certificate are the same for two apps you created; however, the Identity Provider Single Sign-On URL is unique for each app.
- You’ll need to pass the Identity Provider Single Sign-On URL that is unique to this application as well as the X.509 Certificate that is shared between the two applications as deployment parameters when deploying your sidecar. The process of deploying or re-deploying your sidecar with these parameters will look different depending on how you deploy your sidecars.
- Once your sidecar is updated with these two values, you’ll be able to use the IdP-initiated login flow as well as the SP-initiated login flow to access your Snowflake account through the Cyral Sidecar with your Okta identity.
The post Using SSO With Snowflake and Cyral appeared first on Cyral.
*** This is a Security Bloggers Network syndicated blog from Blog – Cyral authored by Kaizen Towfiq. Read the original post at: https://cyral.com/blog/using-sso-with-snowflake-and-cyral/
