

April Product Update
Teamwork makes the dream work!
Teamwork makes the dream work – an annoyingly accurate cliche we’ve repeatedly heard over the years from sports fields to corporate offices. It’s a phrase that holds especially true when it comes to compliance. Compliance takes more than a team, it takes a village – a village of analysts, managers, auditors, vendors, executives, and even board members. Each plays an invaluable role in risk management, making it imperative that the tools they use accommodate handoffs and a certain degree of collaboration.
With this in mind, our most recent release focuses on expanding access to features like the risk register, collecting and communicating additional assessment details, and tailoring how information is presented within the platform to make tasks easier for certain roles.
Keep reading below to see which dreams we’ve turned into a reality this April.
Featured Updates:
- Risk Register
-
- – Team Access
-
Assessments- – Metadata
- – Document Storage Location
Control Views- – Evidence on Questions List
- – CSF Control List Filter
- – My Controls Expandable View
Risk Register
Team Access
Security is a team effort, right? We know it’s important to bring your friends and family (okay, maybe just your authorized co-workers) in on the fun, so our update brings team access to the Risk Register tab in CyberStrong. Once a team is granted access to a risk register dashboard, all members of that team will have the ability to create, edit, and delete risks within that dashboard.
To grant teams access to an existing risk register dashboard, follow the guidance outlined below:
- Navigate to the Risk Register tab within the home navigation bar.
- Select the dashboard you want to grant access to from the dropdown menu in the top left corner.
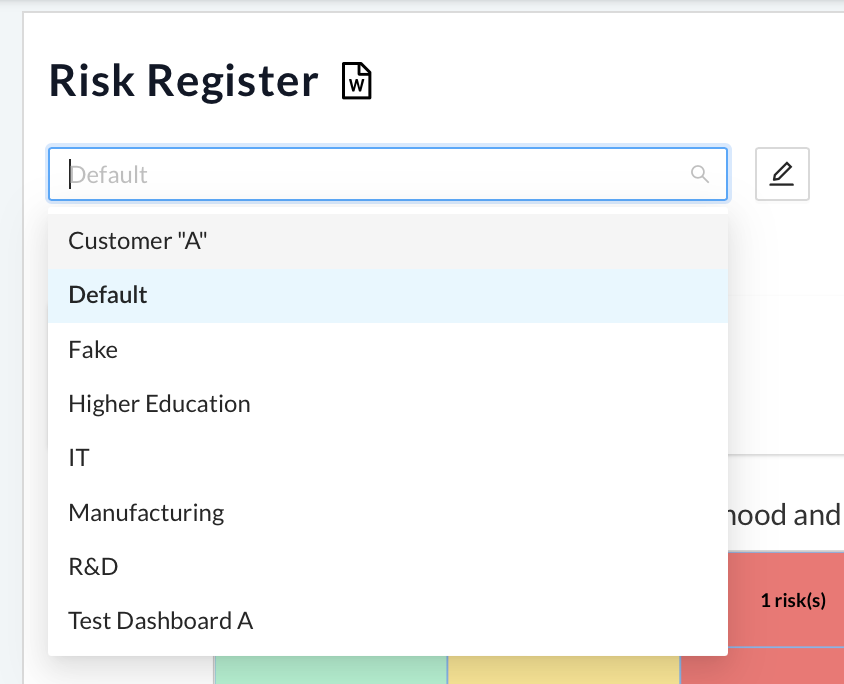
- Click the pencil icon to the right of the dropdown menu to edit the dashboard.
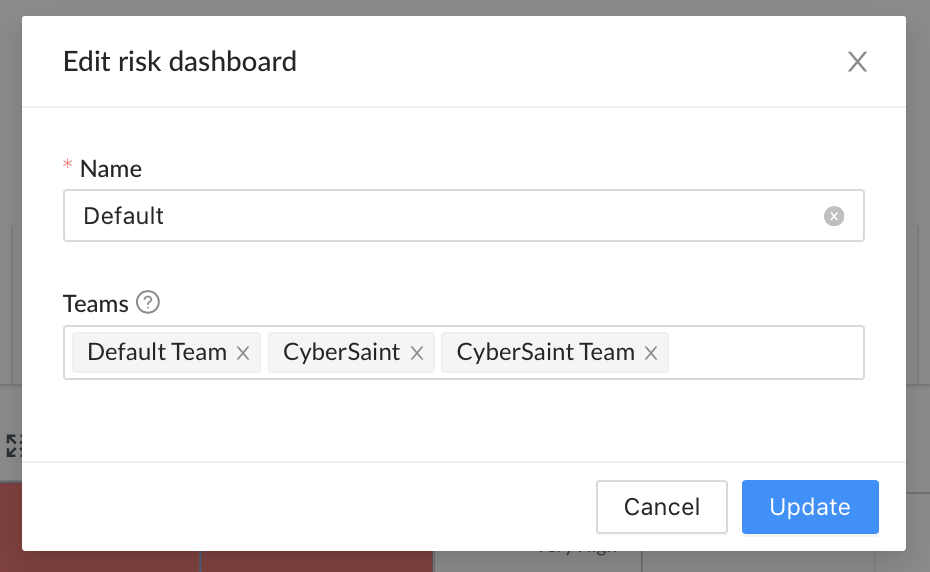
- Within the pop-up window, select the teams you’d like to give access to this dashboard from the ‘Teams’ dropdown menu.
Note: More than one team can be selected.

- Once you’ve completed the fields within the pop-up, click the blue ‘Update’ button in the bottom right corner of the window to confirm your selections.

To grant teams access to a new risk register dashboard, follow the guidance outlined below:
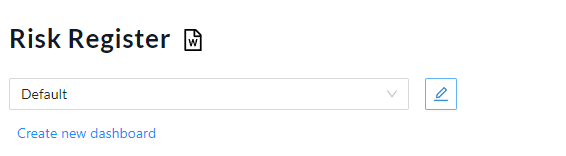
- Navigate to the Risk Register tab within the home navigation bar.
- Click the ‘Create new dashboard’ link below the dropdown field to create a new dashboard.
- Within the pop-up window, populate the name field with the desired name of the dashboard and select the teams you’d like to give access to this dashboard from the ‘Teams’ dropdown menu.
Note: More than one team can be selected.
- Once you’ve completed the fields within the pop-up, click the blue ‘Create’ button in the bottom right corner of the window to confirm your selections.
Note: When associating controls with a risk, users will only be able to view and select controls from assessments they have access to. For example, an Administrator within an environment will have more controls to choose from than a manager or collaborator who only has access to select assessments.


Assessments
Metadata
Have you ever noticed that for every important activity, there’s typically a form you have to fill out before you can actually do the activity? Doctor visits, car rentals, online purchases, risk assessments – it’s forms galore out there. Or, if you’re used to working with spreadsheets to conduct assessments, you’re familiar with that extra tab at the beginning of the sheet where you have to identify the name, location, criticality, and a hundred other criteria associated with the asset you’re about to assess.
We call this information ‘assessment metadata’ – and until now, there wasn’t an ideal place to house this information within CyberStrong. Now, Administrators can define metadata fields at the framework level and make them available to other Administrators and Managers to populate when an assessment leveraging that framework is created.
To define new metadata fields for a particular framework, follow the guidance outlined below:
- Navigate to the ‘Administration’ tab within the home navigation bar and click ‘Frameworks’ from the dropdown menu.
- Navigate to the framework you’d like to define the metadata fields for and select ‘Manage Framework’ from the associated dropdown menu on the right-hand side of the page.
- Click the blue ‘Add New’ button on the right-hand side of the page below the framework description to define a new metadata field.
- Populate the ‘Label’ field with a name that identifies the criterion you wish users to enter into the metadata field upon assessment creation. Use the ‘Hint Message’ field to provide additional help text/guidance to users on what they should include in the metadata field. Lastly, if you want the metadata field to be required, toggle on the ‘Mark Field As Required’ option. If this option is toggled on, users will not be able to create an assessment if this metadata field is blank.
Note: If required metadata fields are created after an assessment has already been created, they will remain blank until a user goes to edit the details of an assessment. Upon doing so, they will be prompted to populate the empty fields.
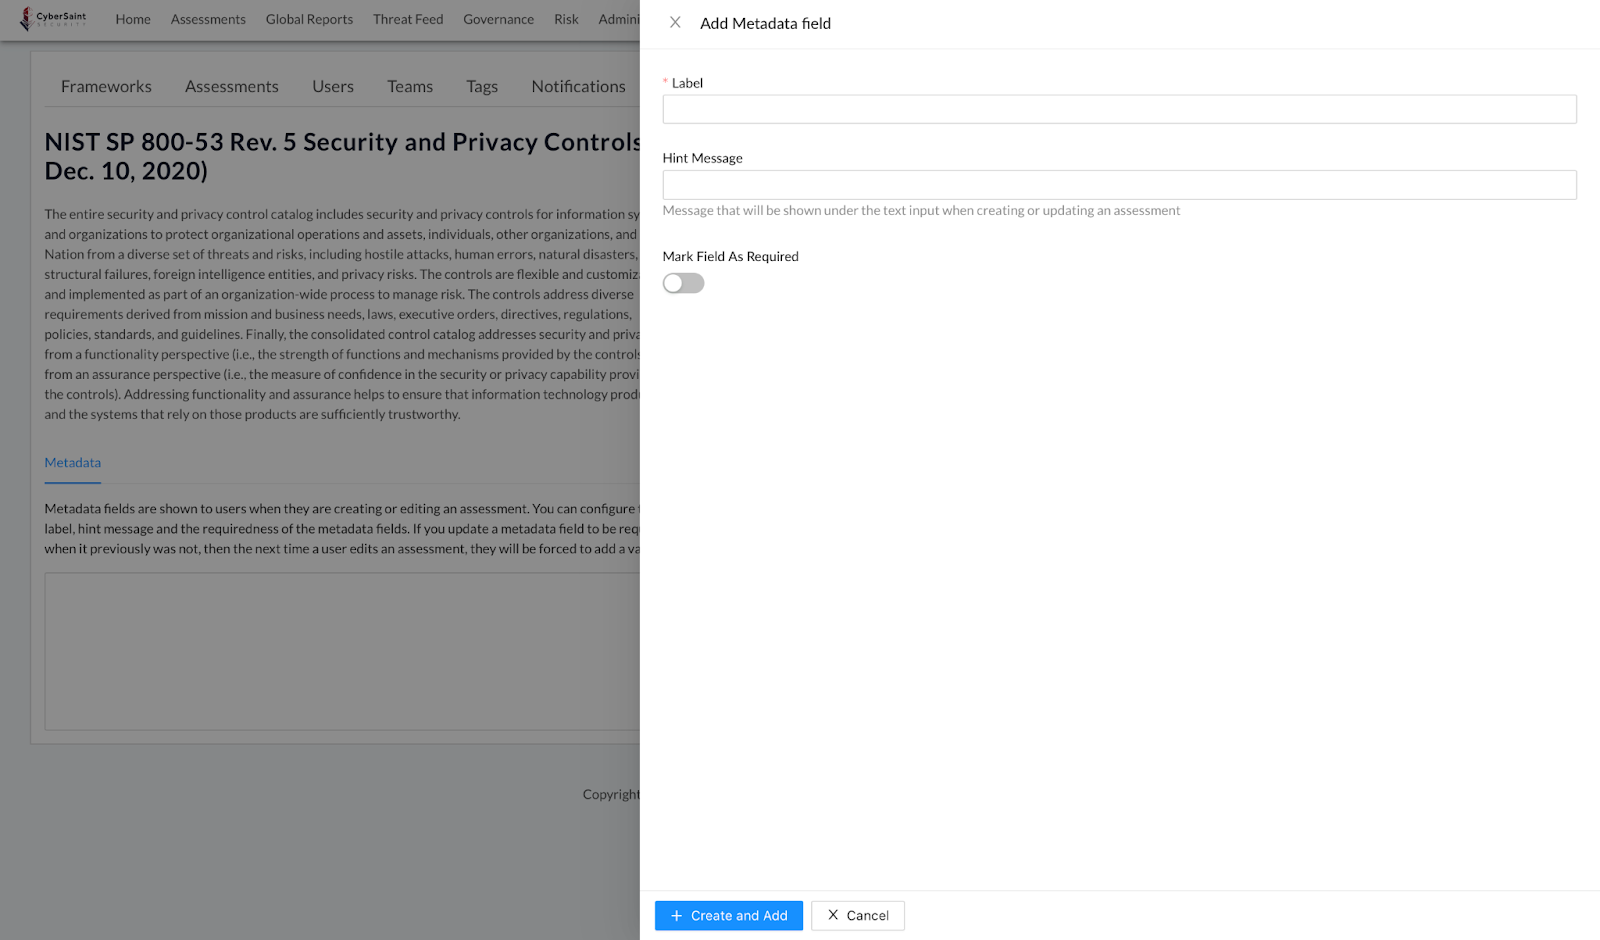
As an example, we have entered the following values in the above fields:
Label: Metadata Field #1
Hint Message: Hint for Metadata Field #1
Mark Field As Required: On - Click the blue ‘Create and Add’ button at the bottom left corner of the popup window to submit your metadata definition and return to the Manage Framework page.


Note: At this time, once a metadata field has been created, it cannot be edited or deleted via the interface. If you need to edit/delete a metadata field, please contact your Customer Success Manager.
To create a new assessment, populate the metadata fields, and see how they would appear on an assessment, please follow the guidance outlined below:
- Navigate to the ‘Assessments’ tab in the home navigation bar.

- Click the blue ‘Create Assessment’ button in the top right corner of the page.

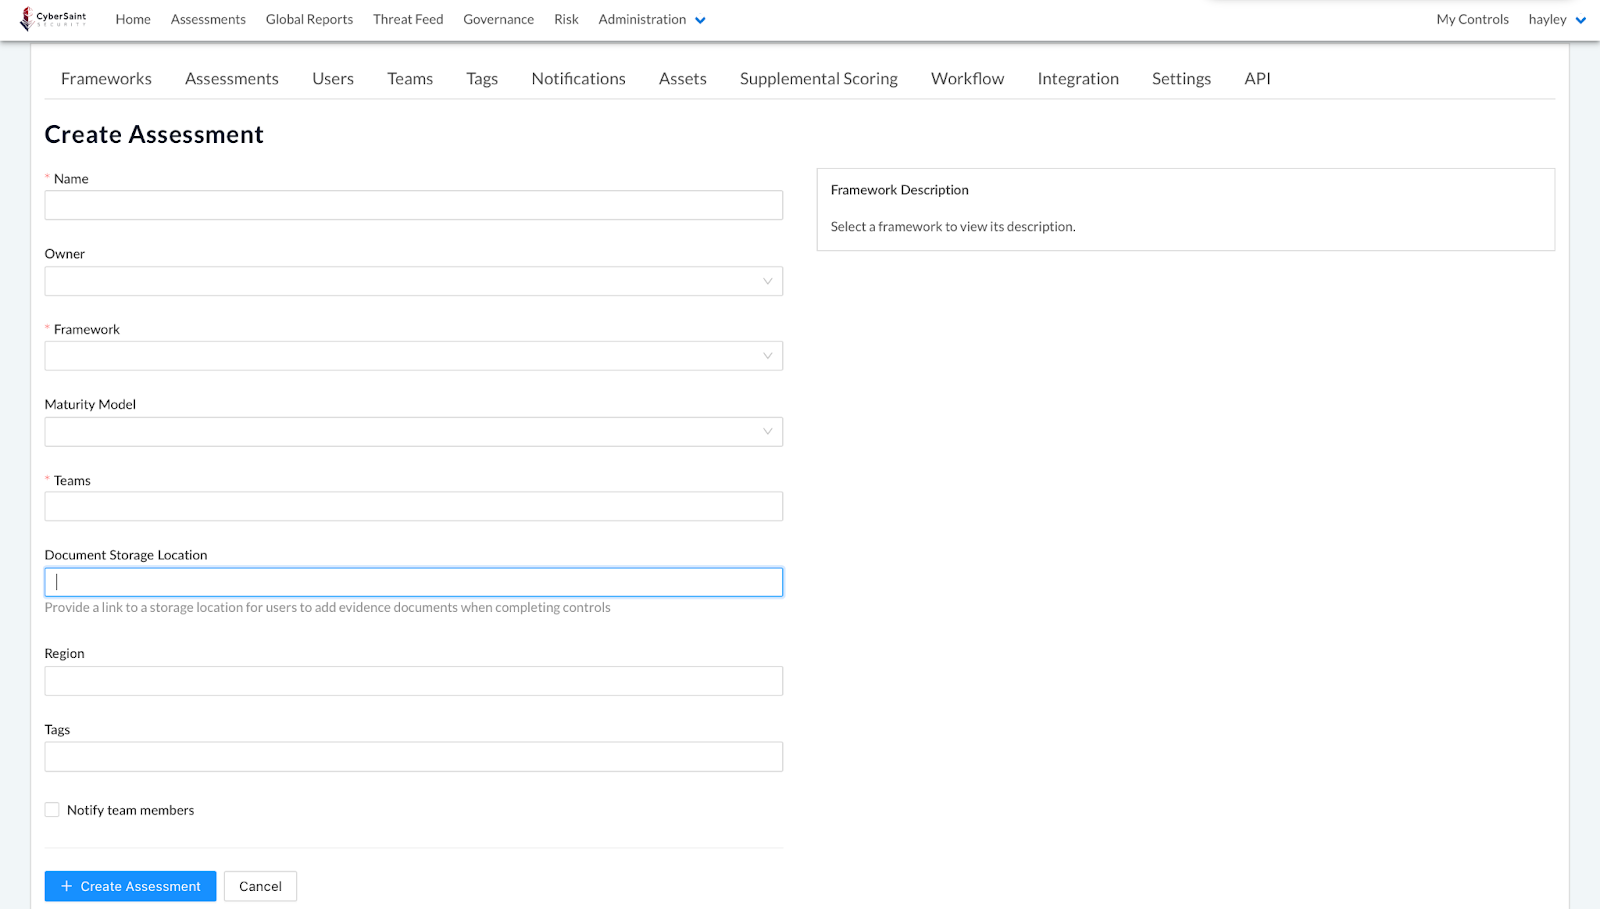
- Populate the fields on the ‘Create Assessment’ page. Note that the previously created metadata field will not appear until you have selected the associated framework in the ‘Framework’ field. Once the appropriate framework has been selected, the metadata field will appear below the ‘Tags’ field and the Hint Message will be displayed beneath it – as shown below.
For our example, we have entered “Metadata Response” in Metadata Field #1.
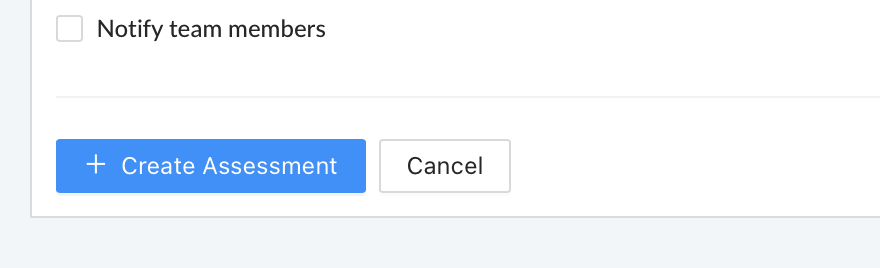
Note: If the ‘Mark Field As Required’ option has been toggled on, and the user creating the assessment attempts to leave it blank, the following error message will be displayed.

- Click the blue ‘Create Assessment’ button in the bottom left corner of the page.

Once you have created the assessment, you will be taken to the Assessment Dashboard. The metadata fields for the assessment can be found at the top of the dashboard, below the Project Completion Status Bar.
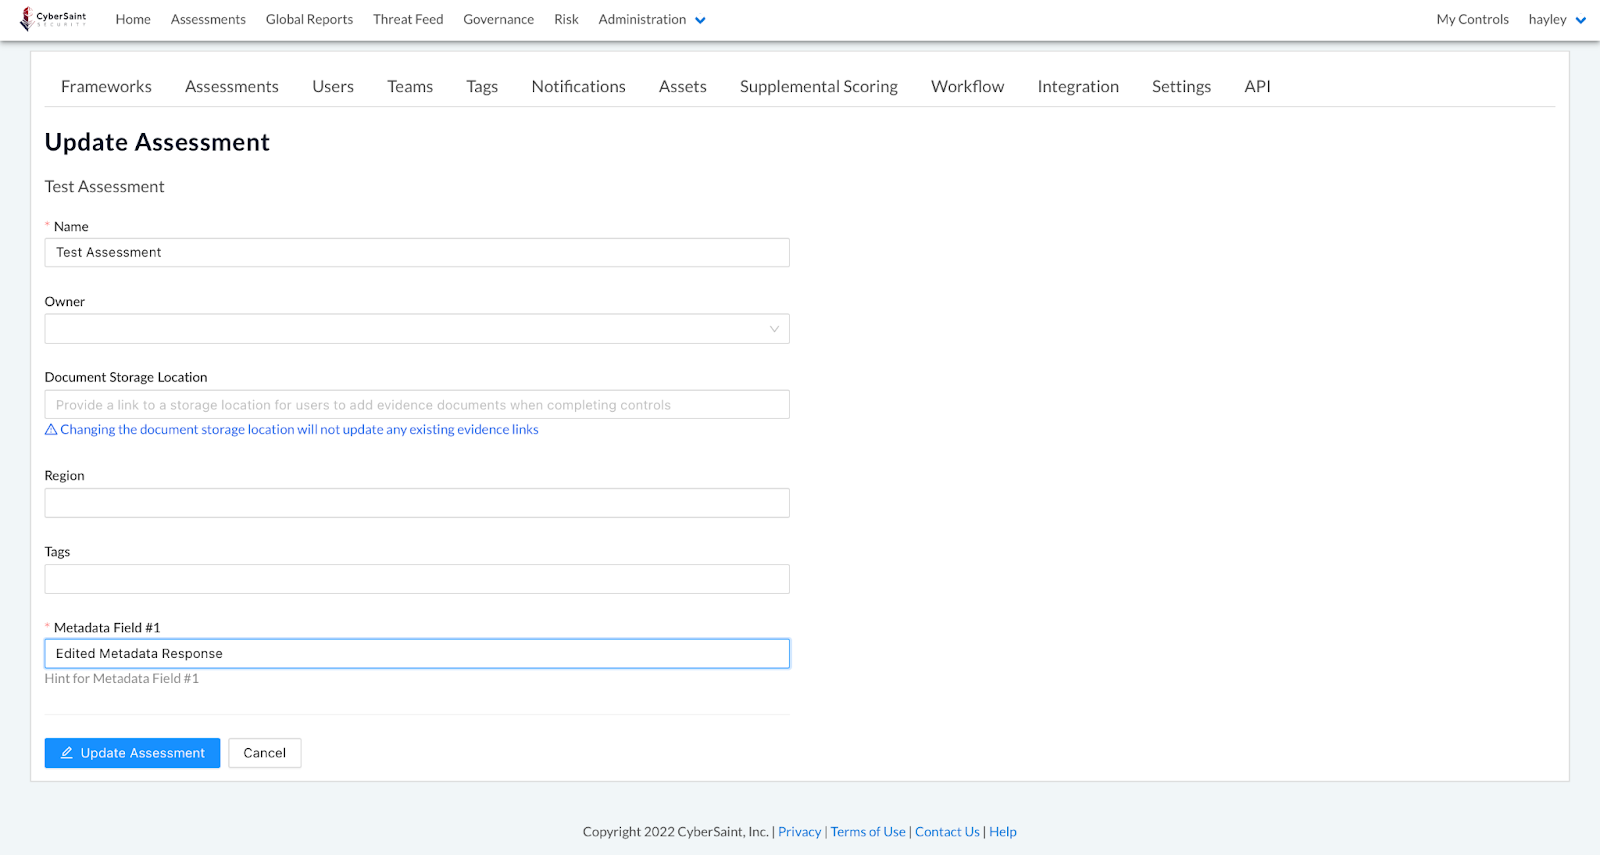
To edit the metadata fields of an existing assessment, follow the guidance outlined below:
- Navigate to the ‘Administration’ tab within the home navigation bar and select ‘Assessments’ from the dropdown menu.
- Navigate to the assessment whose metadata you wish to edit and click the ‘Edit Assessment’ button with the pencil icon within the Actions column.
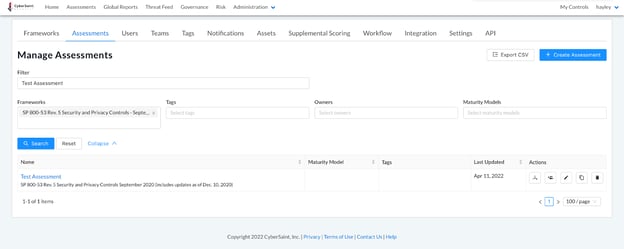
- Edit the metadata field as appropriate and then click the blue ‘Update Assessment’ button in the bottom left corner of the page to submit your changes.


Once you click ‘Update Assessment’, you will be taken back to the Manage Assessments page. To see the results of your changes, click the name of the assessment you just edited to navigate to the Assessment Dashboard.

Note: If you are crosswalking from a framework that has metadata, the metadata will not carry over to the new assessment. If you are crosswalking from a framework that does not have metadata to a framework that does have metadata, you will be prompted to populate the metadata fields on the final step of the crosswalking process.

Document Storage Location
Struggling with users not knowing where to put their evidence or each user putting it somewhere different? Easter egg hunts are fun (especially when you’ve got a relative that hides $20 bills), but if you’re anything like my family, you also know the pain of searching for that last egg that mom swears is out there, but she can’t remember where she put it and no one can find it.
When it comes to your risk assessments, the stakes are typically a bit higher than a $20 bill, so to make your life easier, we’ve created a map for your hunt! Now, when creating an assessment, Administrators and Managers can designate where they want users to store their evidence. This location will appear as a URL at the top of the evidence tab for each control and will take users directly to the designated evidence repository when clicked. Not rotten eggs hidden in trees this year!
To designate a Document Storage Location, follow the guidance outlined below:
- Navigate to the ‘Assessments’ tab in the home navigation bar.
- Click the blue ‘Create Assessment’ button in the top right corner of the page.
- Populate the fields on the ‘Create Assessment’ page. For the ‘Document Storage Location’ field, provide the URL of the storage location where you would like users to add their evidence.
Note: The URL provided must be a valid URL beginning with “https://”. If it does not, the following error will be displayed.

- Click the blue ‘Create Assessment’ button in the bottom left corner of the page.
Once you have created the assessment, you will be taken to the Assessment Dashboard. To view the Document Storage Location, follow the guidance outlined below:
- Navigate to the ‘Controls’ tab within the assessment.
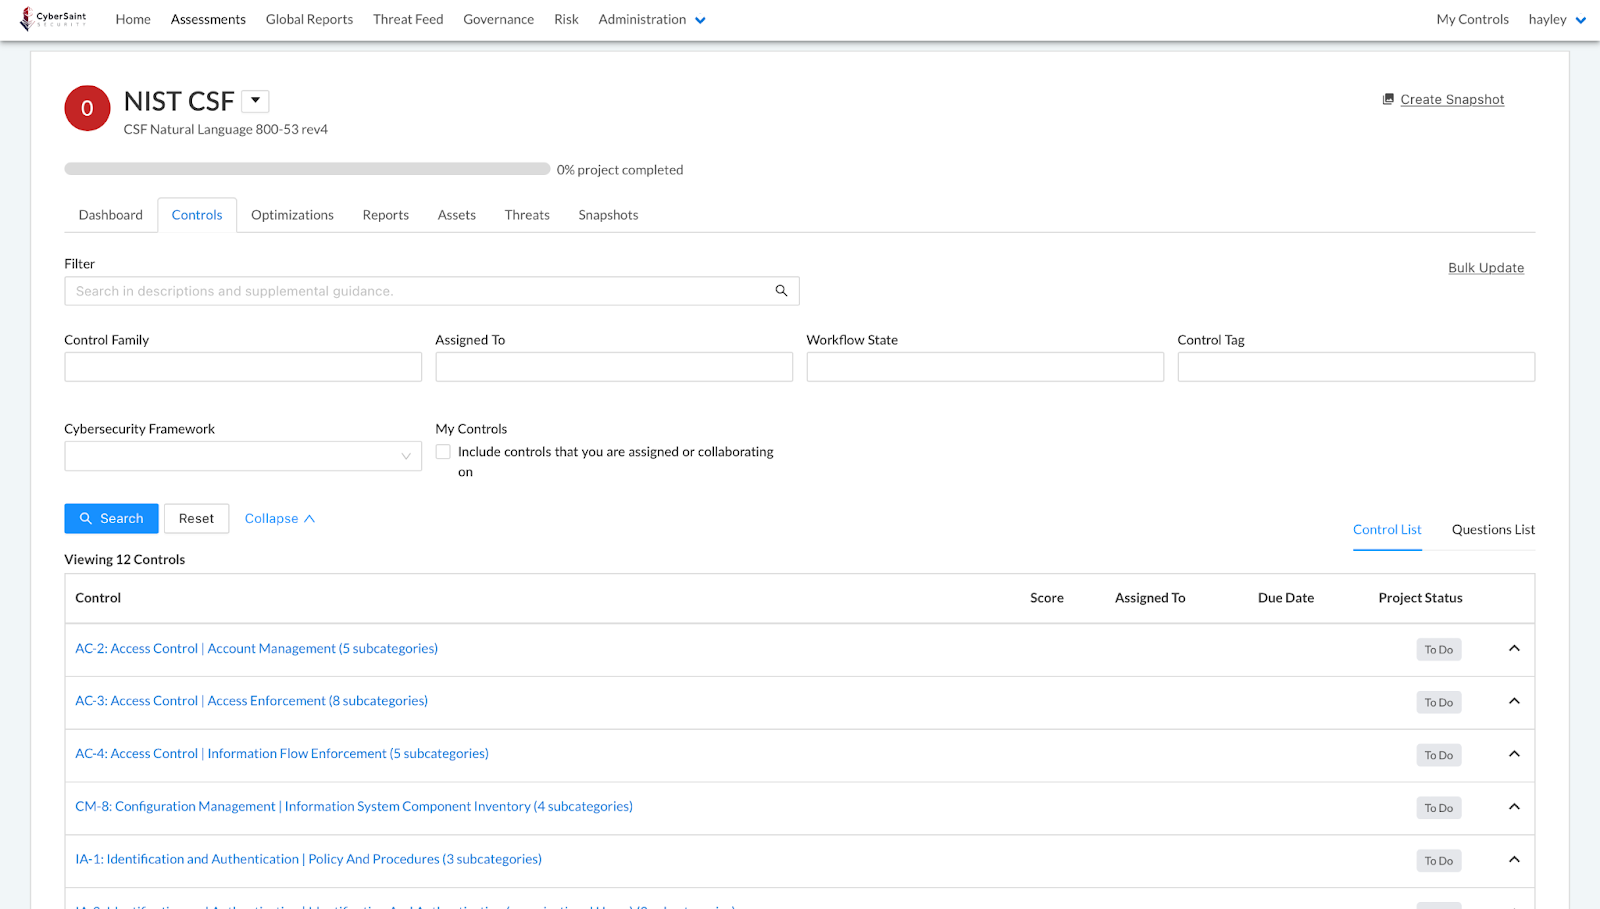
- Click the name of a control to navigate to the control’s Score tab.
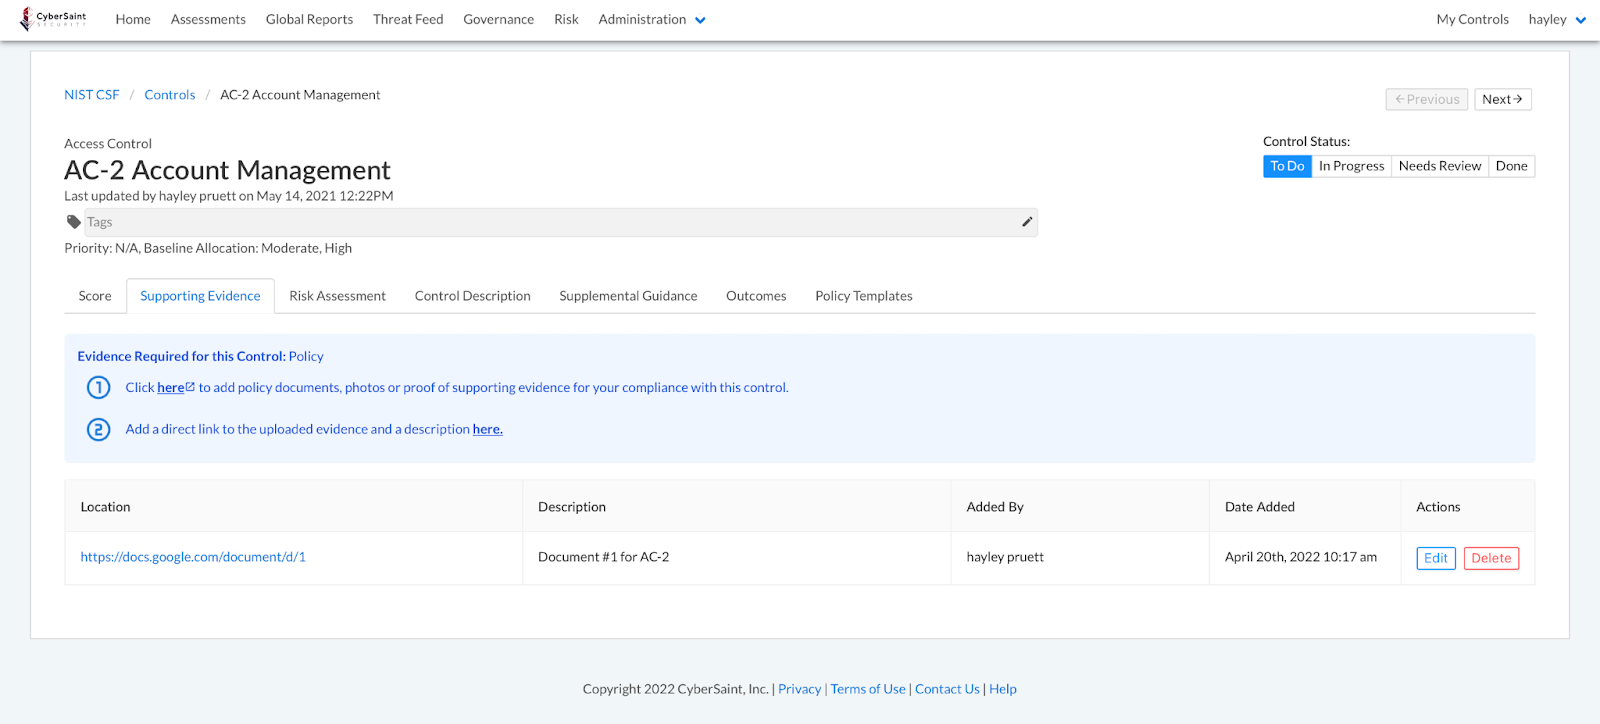
- Navigate to the control’s ‘Supporting Evidence’ tab.
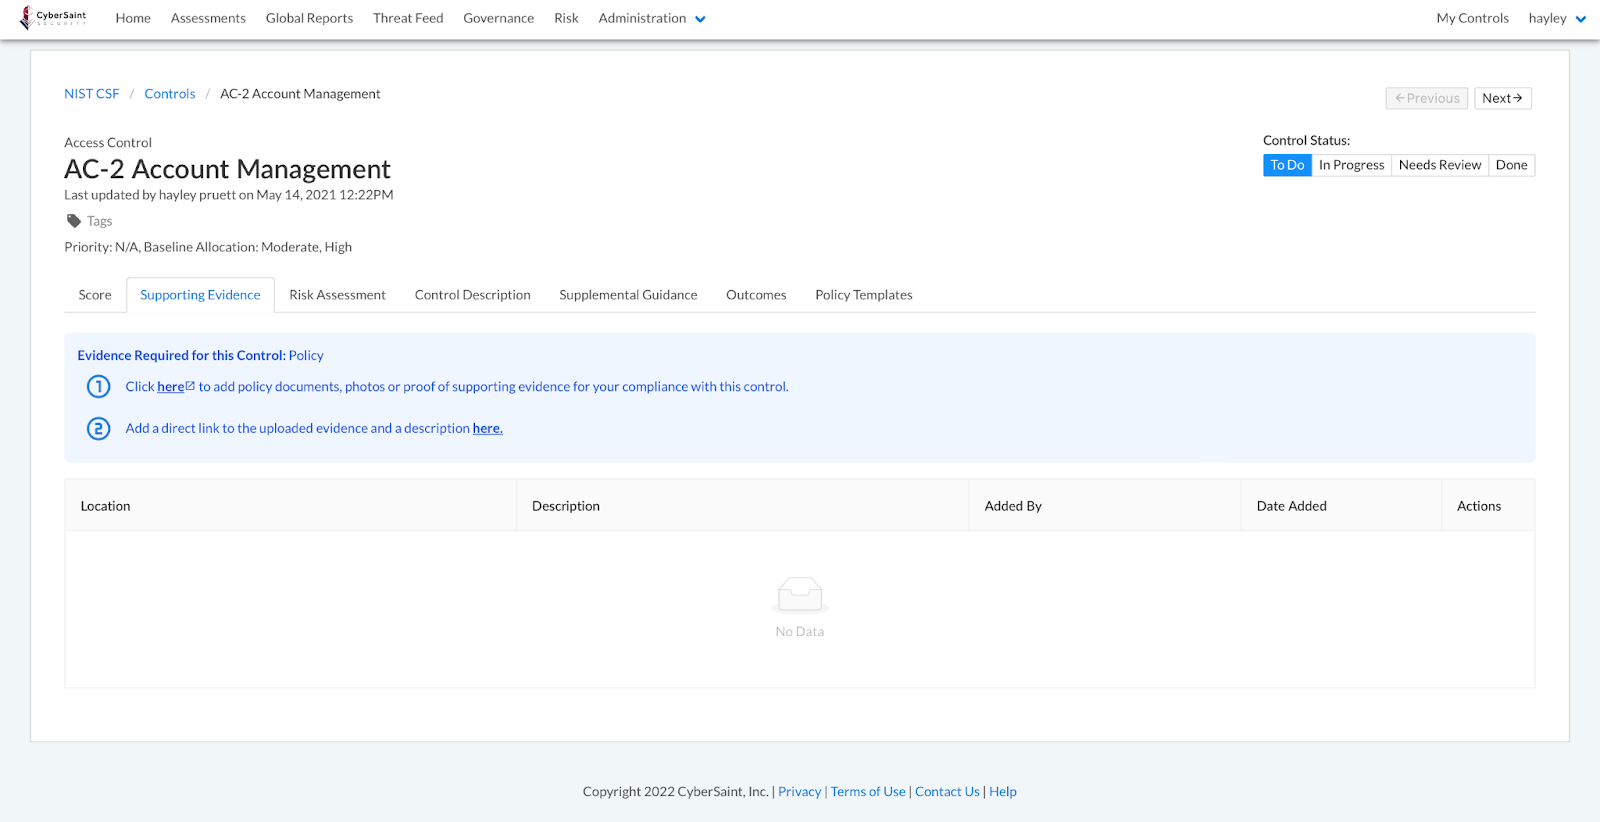
The link labeled ‘here’ in step #1 will navigate users to the designated Document Storage Location when clicked.

To log evidence stored within the designated Document Storage Location within CyberStrong, follow the guidance outlined below:
- Click the link labeled ‘here’ in step #2.
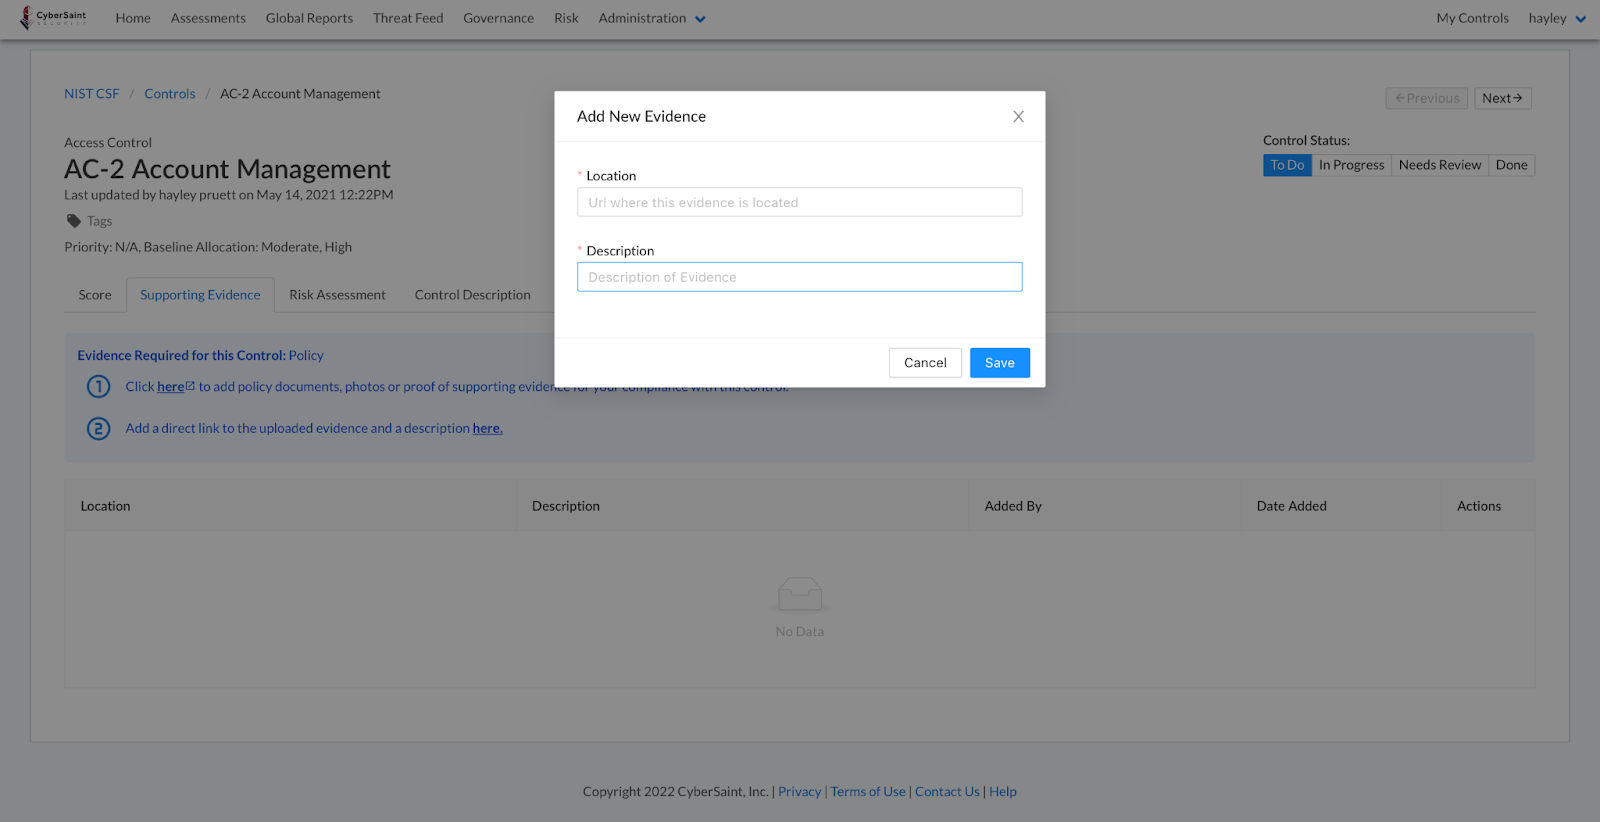
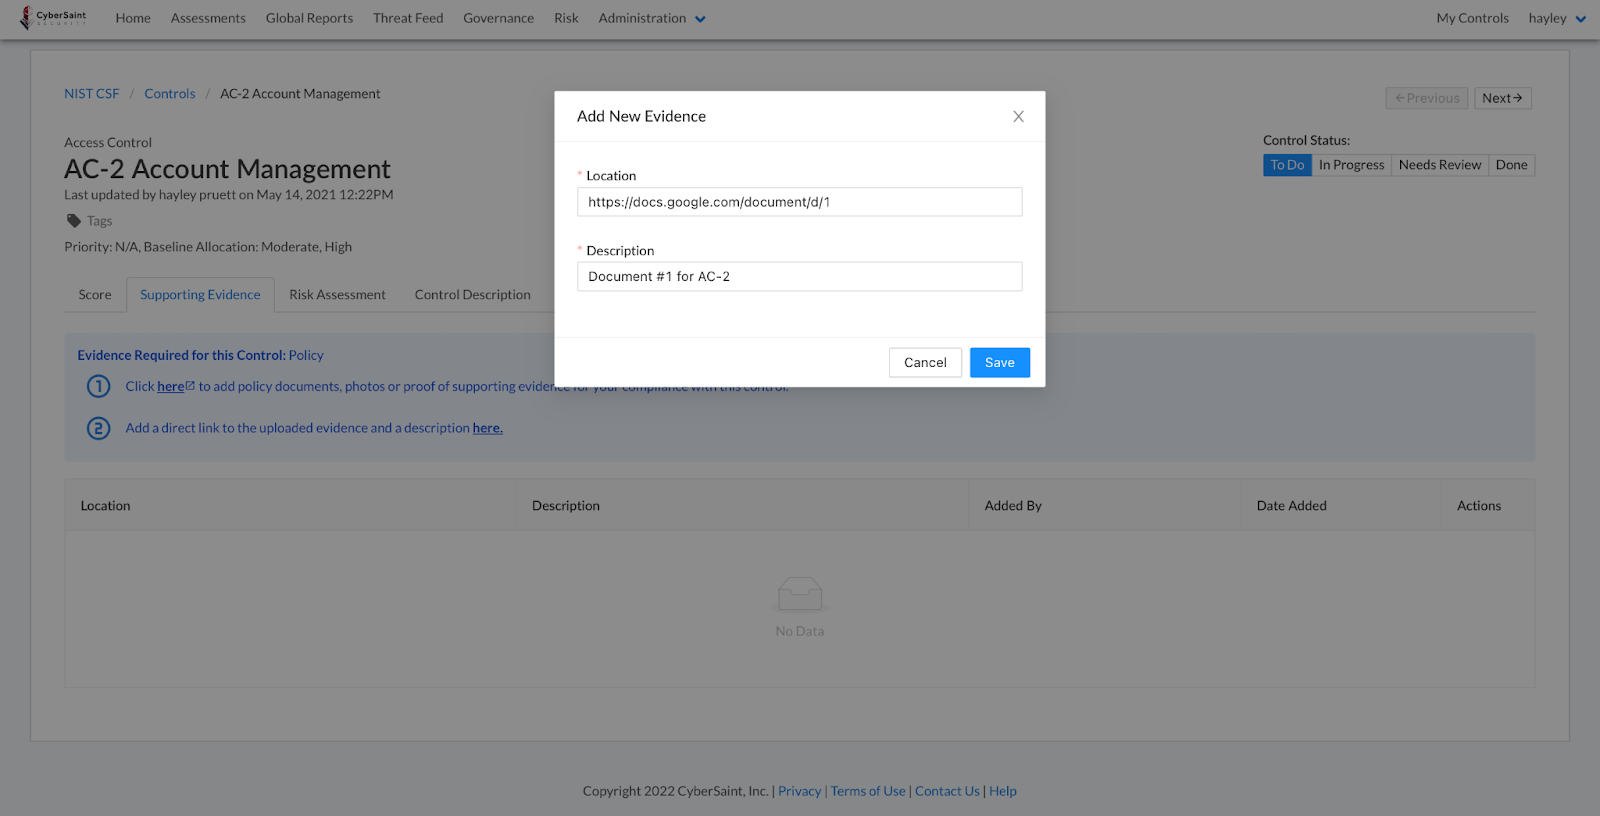
- Provide a URL and a description for the evidence, then click the blue ‘Save’ button in the bottom right corner of the popup window to submit your entries.
Control Views
Evidence on Questions List
Audits are a lot like divorces. They’re long, painful, and expensive. If you want to keep your house, you can’t really skip steps. But what if you could expedite the steps? Loophole!
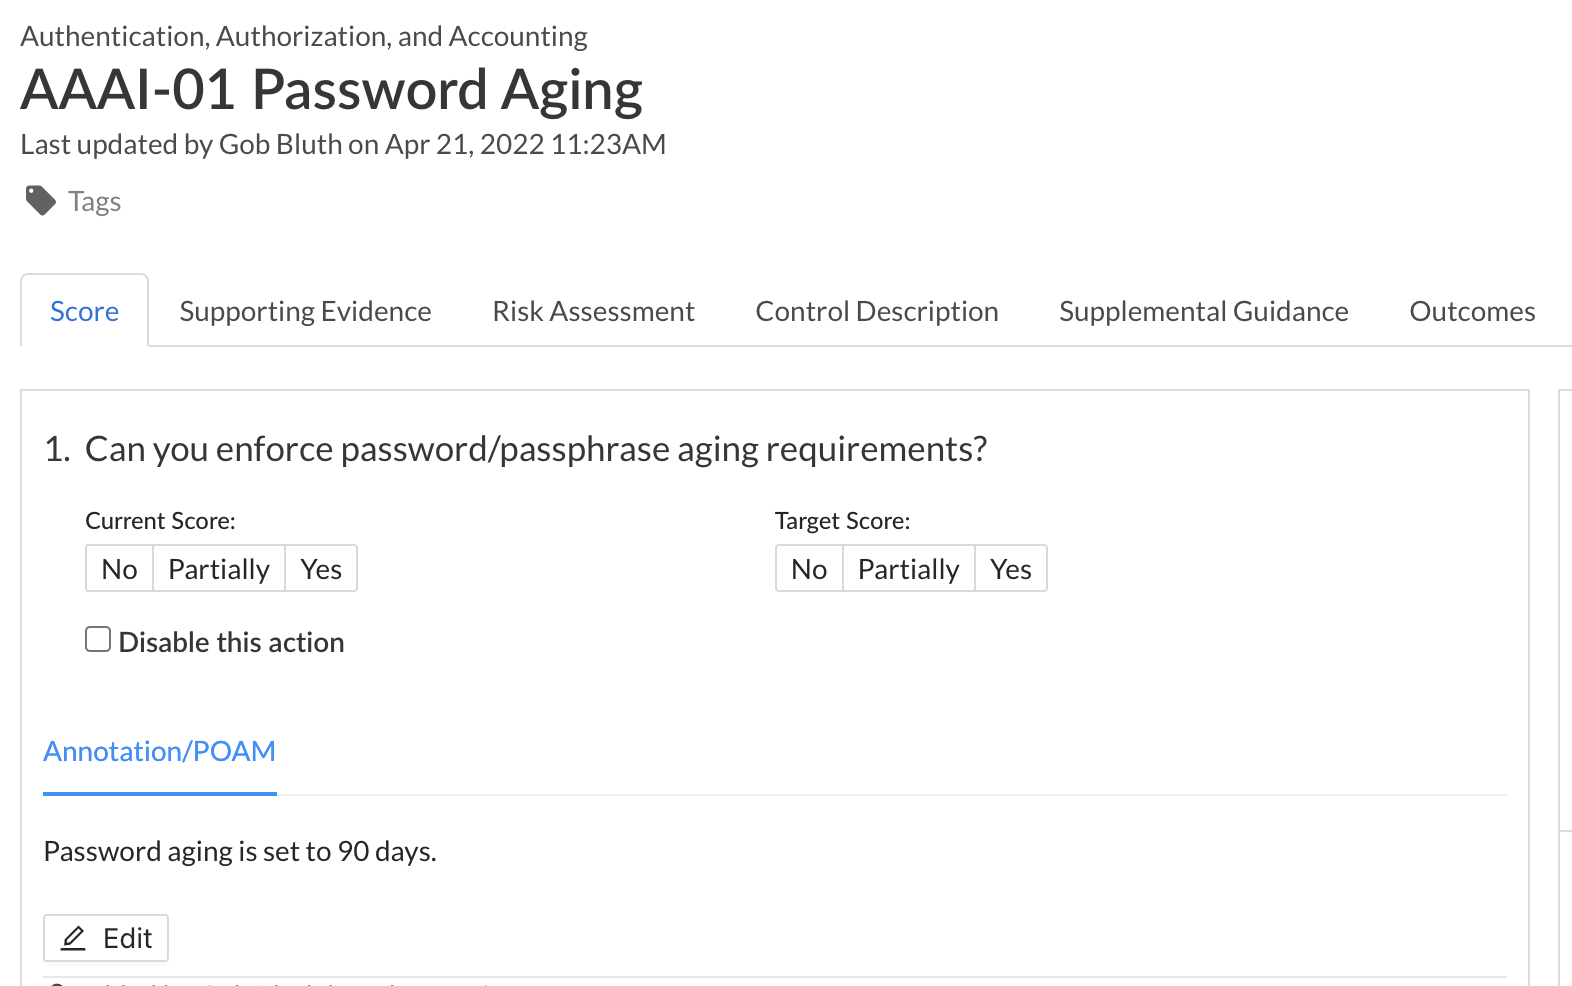
Unfortunately, there’s no easy button for divorces (add that to Staples’ to-do list), but there is a fast pass for audits! Cue the Questions List. Say goodbye to obnoxiously high hourly rates from auditors with our latest enhancements to the Questions List. With the addition of evidence to the Questions List, auditors and the like can get in and get out with minimal button clicks and page turns. For each control, users can now see underlying control actions, their current scores and target scores, annotations, and relevant linked evidence all on one page!
To view evidence within the Questions List, follow the outlined guidance below:
- Navigate to the ‘Assessments’ tab within the home navigation bar.
- Click the name of the assessment whose Question List you’d like to view.
- Navigate to the ‘Controls’ tab within the assessment dashboard.
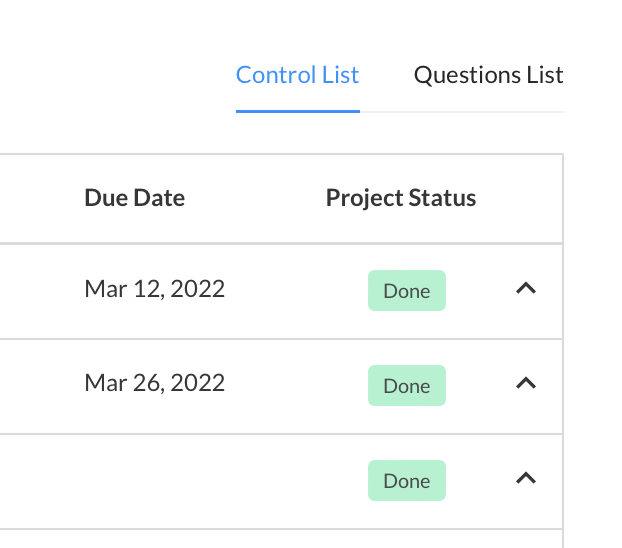
- Click ‘Questions List’ at the top right corner of the controls list.
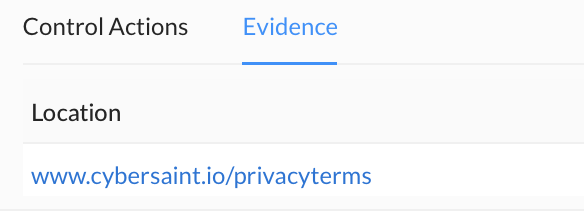
- Navigate to the control you’d like to review and click the ‘Evidence’ tab.


Within the evidence tab, you will be able to see the following for each piece of evidence associated with a control:
- Location
- Description
- Added By
- Date Added
To review the artifact itself, click the link under the Location field to navigate to where the evidence is locally stored.
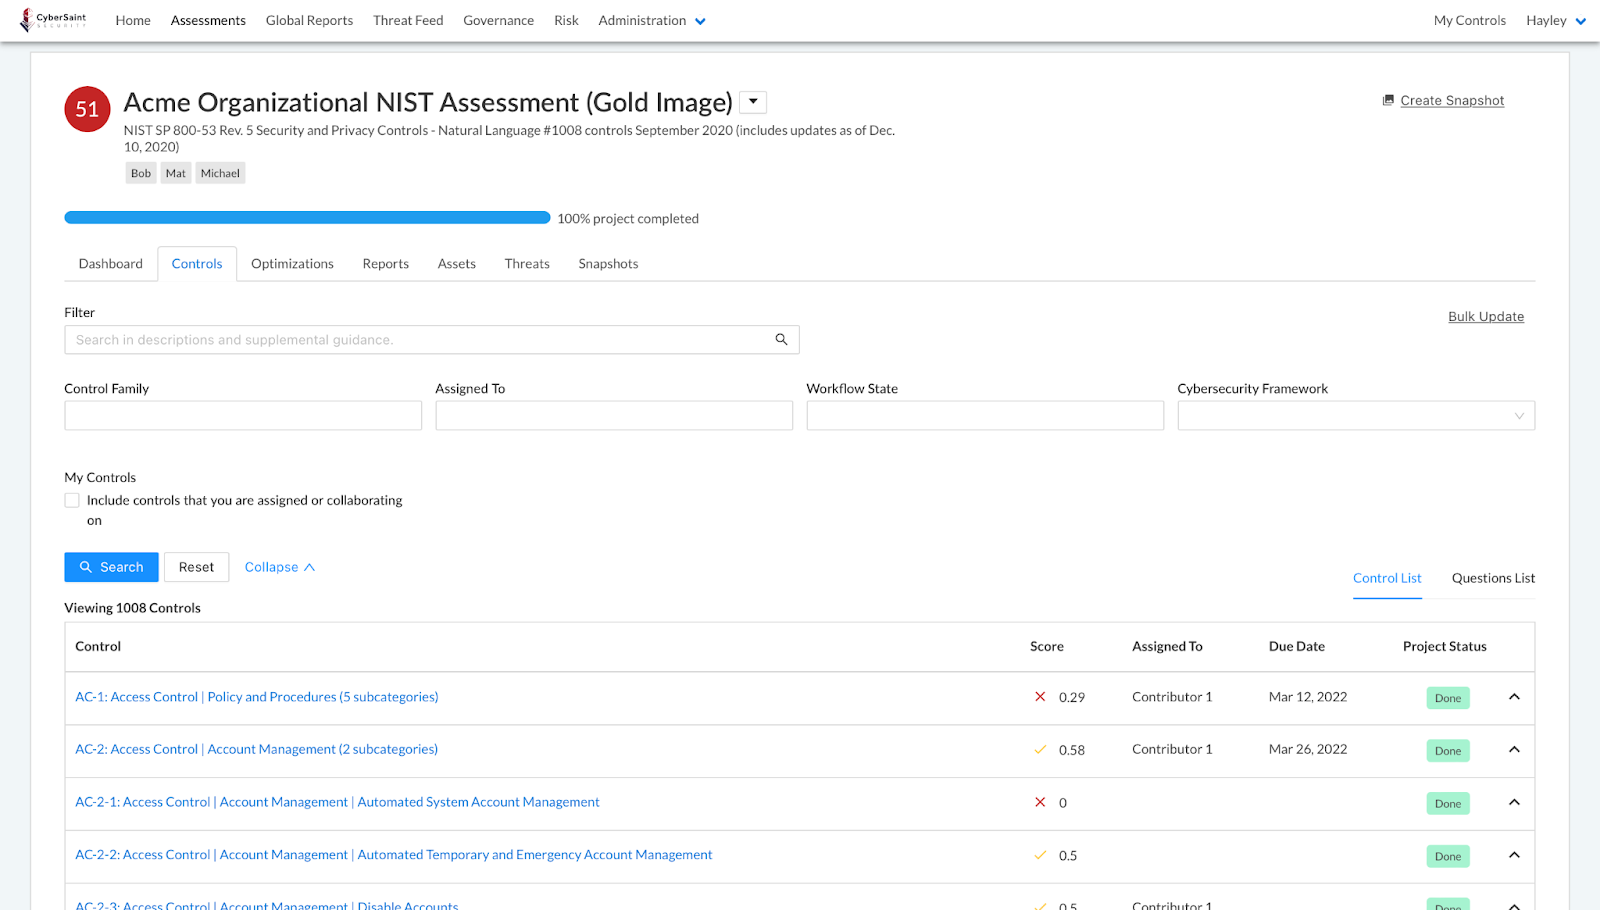
CSF Control List Filter
If you’re like us, the NIST CSF is your bread and butter. Those who know it, know it like the back of their hands. It’s one of the more versatile standards in the market; however, it’s not the only standard, and depending on your needs, there may be a framework out there that better fits the bill. When this happens, it can still be helpful to view the other framework through the lens of the CSF to better conceptualize the controls you’re working with. For this reason, we’ve made the controls list filterable by the CSF functions, categories, and subcategories.
To filter the controls list by the Cybersecurity Framework, follow the guidance outlined below:
- Navigate to the ‘Assessments’ tab within the home navigation bar.
- Click the name of the assessment whose Question List you’d like to view.
- Navigate to the ‘Controls’ tab within the assessment dashboard.
- Select the function, category, or subcategory you’d like to filter by from the Cybersecurity Framework dropdown field on the left-hand side of the page.
Note: Only one selection can be made in this field at a time.
The functions and categories within the dropdown menu can be expanded and collapsed by clicking on the triangle to the left of the function/category name.
- Click the blue ‘Search’ button at the top left corner of the controls list to apply the selected filter.


My Controls Expandable View
So, you may be thinking, “ok, you made the lives of auditors and reviewers easier… big whoop. What about me – the actual end-user of the platform, the one in the system every day actually doing the work?”
Repeat after me, Dave Buznik. Goosfraba.
Rest assured, we’ve got a banana for that anger monkey.
Within the ‘My Controls’ tab, users can now add evidence and annotations directly to the controls / control actions assigned to them or that they’re collaborating on without having to navigate to another page. This allows users to quickly add responses across controls and assessments without getting bogged down in the other fields within a control’s Score tab – although that option still exists if in-the-weeds is more your style.
To add evidence and responses via the My Controls view, follow the guidance outlined below:
- Navigate to the ‘My Controls’ tab in the top right corner of the home navigation bar to access the list of controls assigned to you.
- Find the control you want to add evidence or an annotation to and click the + icon to the left of the control label.
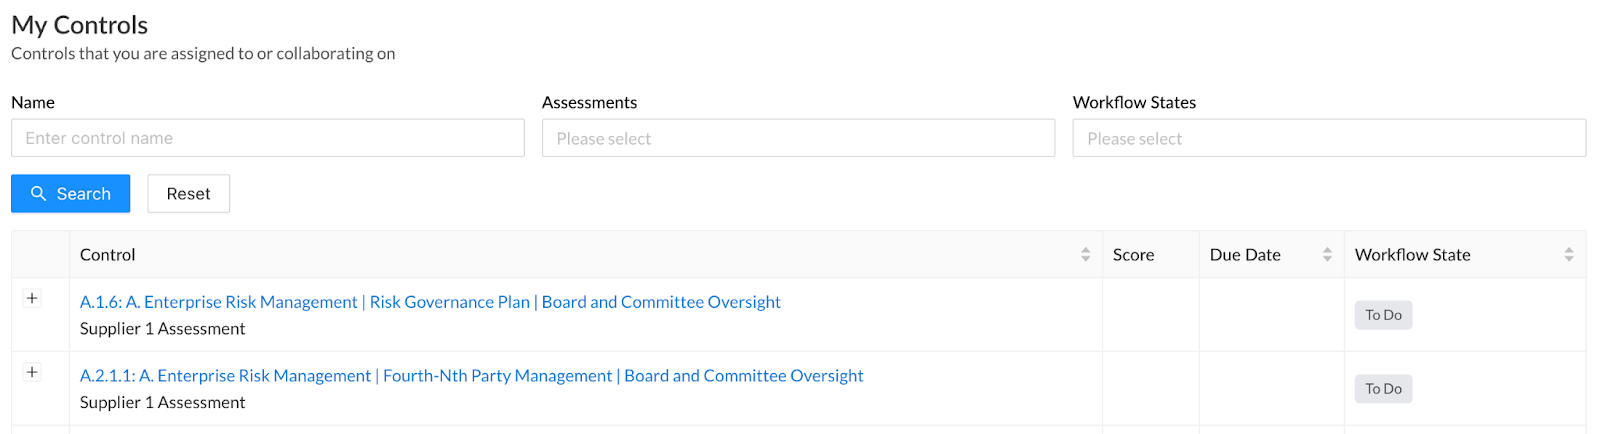
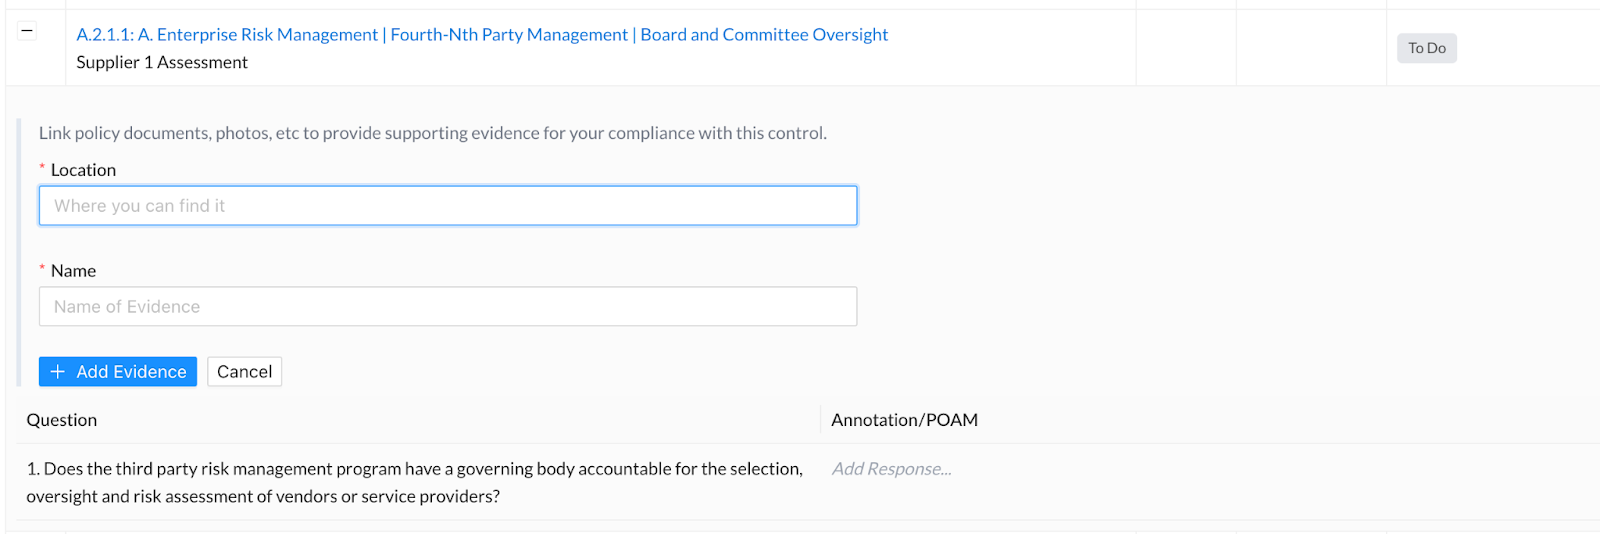
Once expanded, you will see a link for adding new evidence, a list of the underlying controls actions for that control, and an open text Annotation / POAM field next to each control action.
- To add evidence to a control, click the blue ‘+ Add New Evidence’ link above the first question.
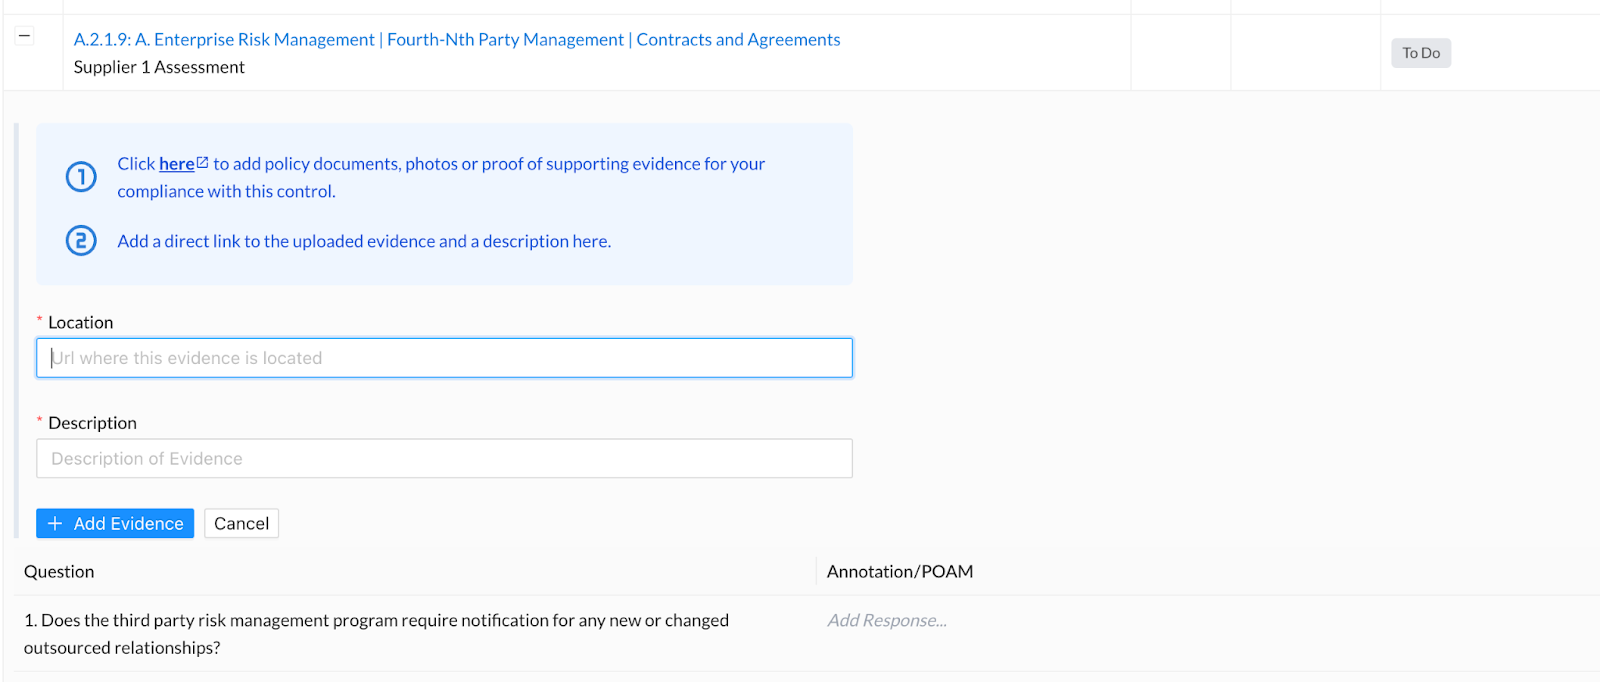
If your Manager or Administrator has designated a Document Storage Location for the assessment a control belongs to, additional guidance will appear (as shown below) to instruct users where to upload their evidence.
- Populate the Location and Name fields and then click the blue ‘+ Add Evidence’ button below the Name field to submit your entries.
Once submitted, the linked evidence will appear above the ‘+ Add New Evidence’ link within the My Controls tab, as well as on the Supporting Evidence tab if you were to click into the control.
- To add an Annotation / POAM, click where it says ‘Add Response’ within the open text ‘Annotation / POAM’ field, enter your response, format it as appropriate, and then click the blue “Save” button below the field.


Once saved, your response will also appear on the Score tab of the control.
Teamwork makes the dream work!
Teamwork makes the dream work – an annoyingly accurate cliche we’ve repeatedly heard over the years from sports fields to corporate offices. It’s a phrase that holds especially true when it comes to compliance. Compliance takes more than a team, it takes a village – a village of analysts, managers, auditors, vendors, executives, and even board members. Each plays an invaluable role in risk management, making it imperative that the tools they use accommodate handoffs and a certain degree of collaboration.
With this in mind, our most recent release focuses on expanding access to features like the risk register, collecting and communicating additional assessment details, and tailoring how information is presented within the platform to make tasks easier for certain roles.
Keep reading below to see which dreams we’ve turned into a reality this April.
Featured Updates:
- Risk Register
-
- – Team Access
-
Assessments- – Metadata
- – Document Storage Location
Control Views- – Evidence on Questions List
- – CSF Control List Filter
- – My Controls Expandable View
Risk Register
Team Access
Security is a team effort, right? We know it’s important to bring your friends and family (okay, maybe just your authorized co-workers) in on the fun, so our update brings team access to the Risk Register tab in CyberStrong. Once a team is granted access to a risk register dashboard, all members of that team will have the ability to create, edit, and delete risks within that dashboard.
To grant teams access to an existing risk register dashboard, follow the guidance outlined below:
- Navigate to the Risk Register tab within the home navigation bar.
- Select the dashboard you want to grant access to from the dropdown menu in the top left corner.
- Click the pencil icon to the right of the dropdown menu to edit the dashboard.
- Within the pop-up window, select the teams you’d like to give access to this dashboard from the ‘Teams’ dropdown menu.
Note: More than one team can be selected.
- Once you’ve completed the fields within the pop-up, click the blue ‘Update’ button in the bottom right corner of the window to confirm your selections.
To grant teams access to a new risk register dashboard, follow the guidance outlined below:
- Navigate to the Risk Register tab within the home navigation bar.
- Click the ‘Create new dashboard’ link below the dropdown field to create a new dashboard.
- Within the pop-up window, populate the name field with the desired name of the dashboard and select the teams you’d like to give access to this dashboard from the ‘Teams’ dropdown menu.
Note: More than one team can be selected.
- Once you’ve completed the fields within the pop-up, click the blue ‘Create’ button in the bottom right corner of the window to confirm your selections.
Note: When associating controls with a risk, users will only be able to view and select controls from assessments they have access to. For example, an Administrator within an environment will have more controls to choose from than a manager or collaborator who only has access to select assessments.
Assessments
Metadata
Have you ever noticed that for every important activity, there’s typically a form you have to fill out before you can actually do the activity? Doctor visits, car rentals, online purchases, risk assessments – it’s forms galore out there. Or, if you’re used to working with spreadsheets to conduct assessments, you’re familiar with that extra tab at the beginning of the sheet where you have to identify the name, location, criticality, and a hundred other criteria associated with the asset you’re about to assess.
We call this information ‘assessment metadata’ – and until now, there wasn’t an ideal place to house this information within CyberStrong. Now, Administrators can define metadata fields at the framework level and make them available to other Administrators and Managers to populate when an assessment leveraging that framework is created.
To define new metadata fields for a particular framework, follow the guidance outlined below:
- Navigate to the ‘Administration’ tab within the home navigation bar and click ‘Frameworks’ from the dropdown menu.
- Navigate to the framework you’d like to define the metadata fields for and select ‘Manage Framework’ from the associated dropdown menu on the right-hand side of the page.
- Click the blue ‘Add New’ button on the right-hand side of the page below the framework description to define a new metadata field.
- Populate the ‘Label’ field with a name that identifies the criterion you wish users to enter into the metadata field upon assessment creation. Use the ‘Hint Message’ field to provide additional help text/guidance to users on what they should include in the metadata field. Lastly, if you want the metadata field to be required, toggle on the ‘Mark Field As Required’ option. If this option is toggled on, users will not be able to create an assessment if this metadata field is blank.
Note: If required metadata fields are created after an assessment has already been created, they will remain blank until a user goes to edit the details of an assessment. Upon doing so, they will be prompted to populate the empty fields.
As an example, we have entered the following values in the above fields:
Label: Metadata Field #1
Hint Message: Hint for Metadata Field #1
Mark Field As Required: On - Click the blue ‘Create and Add’ button at the bottom left corner of the popup window to submit your metadata definition and return to the Manage Framework page.
Note: At this time, once a metadata field has been created, it cannot be edited or deleted via the interface. If you need to edit/delete a metadata field, please contact your Customer Success Manager.
To create a new assessment, populate the metadata fields, and see how they would appear on an assessment, please follow the guidance outlined below:
- Navigate to the ‘Assessments’ tab in the home navigation bar.
- Click the blue ‘Create Assessment’ button in the top right corner of the page.
- Populate the fields on the ‘Create Assessment’ page. Note that the previously created metadata field will not appear until you have selected the associated framework in the ‘Framework’ field. Once the appropriate framework has been selected, the metadata field will appear below the ‘Tags’ field and the Hint Message will be displayed beneath it – as shown below.
For our example, we have entered “Metadata Response” in Metadata Field #1.
Note: If the ‘Mark Field As Required’ option has been toggled on, and the user creating the assessment attempts to leave it blank, the following error message will be displayed.
- Click the blue ‘Create Assessment’ button in the bottom left corner of the page.
Once you have created the assessment, you will be taken to the Assessment Dashboard. The metadata fields for the assessment can be found at the top of the dashboard, below the Project Completion Status Bar.
To edit the metadata fields of an existing assessment, follow the guidance outlined below:
- Navigate to the ‘Administration’ tab within the home navigation bar and select ‘Assessments’ from the dropdown menu.
- Navigate to the assessment whose metadata you wish to edit and click the ‘Edit Assessment’ button with the pencil icon within the Actions column.
- Edit the metadata field as appropriate and then click the blue ‘Update Assessment’ button in the bottom left corner of the page to submit your changes.
Once you click ‘Update Assessment’, you will be taken back to the Manage Assessments page. To see the results of your changes, click the name of the assessment you just edited to navigate to the Assessment Dashboard.
Note: If you are crosswalking from a framework that has metadata, the metadata will not carry over to the new assessment. If you are crosswalking from a framework that does not have metadata to a framework that does have metadata, you will be prompted to populate the metadata fields on the final step of the crosswalking process.
Document Storage Location
Struggling with users not knowing where to put their evidence or each user putting it somewhere different? Easter egg hunts are fun (especially when you’ve got a relative that hides $20 bills), but if you’re anything like my family, you also know the pain of searching for that last egg that mom swears is out there, but she can’t remember where she put it and no one can find it.
When it comes to your risk assessments, the stakes are typically a bit higher than a $20 bill, so to make your life easier, we’ve created a map for your hunt! Now, when creating an assessment, Administrators and Managers can designate where they want users to store their evidence. This location will appear as a URL at the top of the evidence tab for each control and will take users directly to the designated evidence repository when clicked. Not rotten eggs hidden in trees this year!
To designate a Document Storage Location, follow the guidance outlined below:
- Navigate to the ‘Assessments’ tab in the home navigation bar.
- Click the blue ‘Create Assessment’ button in the top right corner of the page.
- Populate the fields on the ‘Create Assessment’ page. For the ‘Document Storage Location’ field, provide the URL of the storage location where you would like users to add their evidence.
Note: The URL provided must be a valid URL beginning with “https://”. If it does not, the following error will be displayed.
- Click the blue ‘Create Assessment’ button in the bottom left corner of the page.
Once you have created the assessment, you will be taken to the Assessment Dashboard. To view the Document Storage Location, follow the guidance outlined below:
- Navigate to the ‘Controls’ tab within the assessment.
- Click the name of a control to navigate to the control’s Score tab.
- Navigate to the control’s ‘Supporting Evidence’ tab.
The link labeled ‘here’ in step #1 will navigate users to the designated Document Storage Location when clicked.
To log evidence stored within the designated Document Storage Location within CyberStrong, follow the guidance outlined below:
- Click the link labeled ‘here’ in step #2.
- Provide a URL and a description for the evidence, then click the blue ‘Save’ button in the bottom right corner of the popup window to submit your entries.
Control Views
Evidence on Questions List
Audits are a lot like divorces. They’re long, painful, and expensive. If you want to keep your house, you can’t really skip steps. But what if you could expedite the steps? Loophole!
Unfortunately, there’s no easy button for divorces (add that to Staples’ to-do list), but there is a fast pass for audits! Cue the Questions List. Say goodbye to obnoxiously high hourly rates from auditors with our latest enhancements to the Questions List. With the addition of evidence to the Questions List, auditors and the like can get in and get out with minimal button clicks and page turns. For each control, users can now see underlying control actions, their current scores and target scores, annotations, and relevant linked evidence all on one page!
To view evidence within the Questions List, follow the outlined guidance below:
- Navigate to the ‘Assessments’ tab within the home navigation bar.
- Click the name of the assessment whose Question List you’d like to view.
- Navigate to the ‘Controls’ tab within the assessment dashboard.
- Click ‘Questions List’ at the top right corner of the controls list.
- Navigate to the control you’d like to review and click the ‘Evidence’ tab.
Within the evidence tab, you will be able to see the following for each piece of evidence associated with a control:
- Location
- Description
- Added By
- Date Added
To review the artifact itself, click the link under the Location field to navigate to where the evidence is locally stored.
CSF Control List Filter
If you’re like us, the NIST CSF is your bread and butter. Those who know it, know it like the back of their hands. It’s one of the more versatile standards in the market; however, it’s not the only standard, and depending on your needs, there may be a framework out there that better fits the bill. When this happens, it can still be helpful to view the other framework through the lens of the CSF to better conceptualize the controls you’re working with. For this reason, we’ve made the controls list filterable by the CSF functions, categories, and subcategories.
To filter the controls list by the Cybersecurity Framework, follow the guidance outlined below:
- Navigate to the ‘Assessments’ tab within the home navigation bar.
- Click the name of the assessment whose Question List you’d like to view.
- Navigate to the ‘Controls’ tab within the assessment dashboard.
- Select the function, category, or subcategory you’d like to filter by from the Cybersecurity Framework dropdown field on the left-hand side of the page.
Note: Only one selection can be made in this field at a time.
The functions and categories within the dropdown menu can be expanded and collapsed by clicking on the triangle to the left of the function/category name.
- Click the blue ‘Search’ button at the top left corner of the controls list to apply the selected filter.
My Controls Expandable View
So, you may be thinking, “ok, you made the lives of auditors and reviewers easier… big whoop. What about me – the actual end-user of the platform, the one in the system every day actually doing the work?”
Repeat after me, Dave Buznik. Goosfraba.
Rest assured, we’ve got a banana for that anger monkey.
Within the ‘My Controls’ tab, users can now add evidence and annotations directly to the controls / control actions assigned to them or that they’re collaborating on without having to navigate to another page. This allows users to quickly add responses across controls and assessments without getting bogged down in the other fields within a control’s Score tab – although that option still exists if in-the-weeds is more your style.
To add evidence and responses via the My Controls view, follow the guidance outlined below:
- Navigate to the ‘My Controls’ tab in the top right corner of the home navigation bar to access the list of controls assigned to you.
- Find the control you want to add evidence or an annotation to and click the + icon to the left of the control label.
Once expanded, you will see a link for adding new evidence, a list of the underlying controls actions for that control, and an open text Annotation / POAM field next to each control action.
- To add evidence to a control, click the blue ‘+ Add New Evidence’ link above the first question.
If your Manager or Administrator has designated a Document Storage Location for the assessment a control belongs to, additional guidance will appear (as shown below) to instruct users where to upload their evidence.
- Populate the Location and Name fields and then click the blue ‘+ Add Evidence’ button below the Name field to submit your entries.
Once submitted, the linked evidence will appear above the ‘+ Add New Evidence’ link within the My Controls tab, as well as on the Supporting Evidence tab if you were to click into the control.
- To add an Annotation / POAM, click where it says ‘Add Response’ within the open text ‘Annotation / POAM’ field, enter your response, format it as appropriate, and then click the blue “Save” button below the field.
Once saved, your response will also appear on the Score tab of the control.
*** This is a Security Bloggers Network syndicated blog from CyberSaint Blog authored by CyberSaint Customer Success. Read the original post at: https://www.cybersaint.io/blog/april-2022-product-update
