

How to Convert a Selenium Login Script into a Login Sequence File
Selenium is a tool that allows you to automate browser actions. It is often used by QA engineers to automatically and efficiently test the functionality of web applications. You can create Selenium scripts that examine specific functionality of a web application, ensuring that it produces the expected results.
One of the types of pages that you need to test in the case of most web applications are login pages. Selenium scripts are often used to ensure that changes in the web application do not break the login functionality. These Selenium scripts can now be converted and used by Acunetix to log into the site as part of the security scan.
The Login Sequence Recorder in Acunetix v12 build 190703137 has been updated to support converting Selenium Login Scripts into Login Sequence Files, which can then be used within Acunetix. The login actions are taken from the Selenium script. The Auto-Login feature is used to identify any restricted links, such as Logout links, and the session detection pattern.
To convert the Selenium Login Script into a Login Sequence File:
1. Confirm that the Selenium Login Script is working as expected. You can do it using the Play button to confirm that all the steps are executed correctly. Use the Timer drop-down to configure the playback speed.
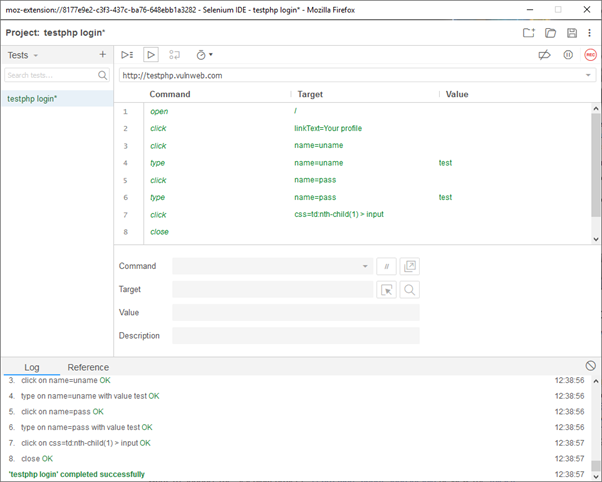
2. Save the Selenium Login Script to a file.
3. Enter the command prompt and change the current directory to C:Program Files (x86)Acunetixcore.
4. Execute the following command:
node lsr generate --sourcetype selenium
  --source source selenium file
  --destination destination LSR file
For example:
node lsr generate --sourcetype selenium
  --source "C:usersadminDownloadstestphp_login.side"
  --destination "C:usersadminDownloadstestphp_login.lsr"
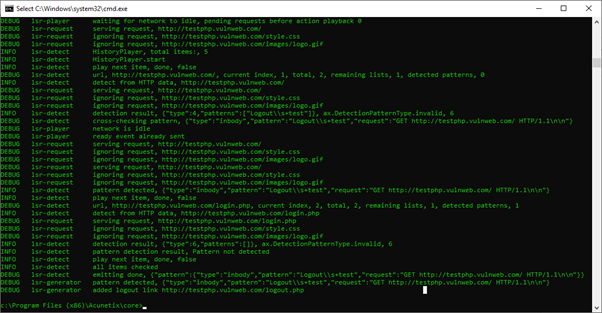
5. The Login Sequence Recorder will load the Selenium file and create login actions. It will then proceed with verifying login actions as well as identifying restricted links and a valid session detection pattern. This might take some time to complete. Progress will be visible in the command prompt window.
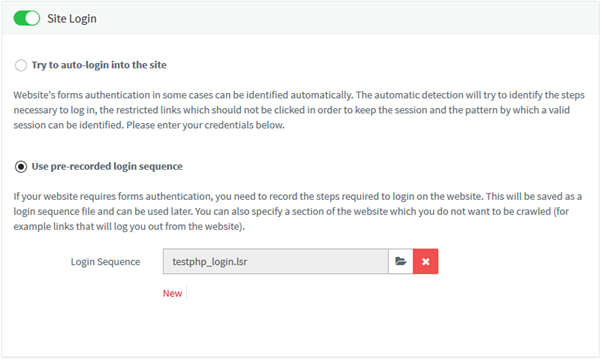
6. You can now upload the resultant .lsr file to the Target configuration > Site Login section in the Acunetix UI.
 Nicholas Sciberras Chief Technical Officer
LinkedIn: https://www.linkedin.com/in/nicholas-sciberras/
As the CTO at Acunetix, Nicholas is passionate about IT security and technology at large. Prior to joining Acunetix in 2012, Nicholas spent 12 years at GFI Software, where he managed the email security and anti-spam product lines, led multiple customer service teams and provided technical training.


*** This is a Security Bloggers Network syndicated blog from Web Security Blog – Acunetix authored by Nicholas Sciberras. Read the original post at: http://feedproxy.google.com/~r/acunetixwebapplicationsecurityblog/~3/-WepcXoprLI/
