

Reversing for Mortals
It’s hard to really know where to start when you’re new to hacking. When
I first started to get into the hacking world I came across something
called Reverse Engineering, the art of de-constructing some product
followed by a detailed analysis and revision of its composition and its
inner workings.
Hacking is all about testing the limits. My problem was that this was a
complex subject and not that easy to follow for a beginner. Some would
say it’s for superior beings, hence this entry, which is meant to help
you understand how reversing works and give you an incentive to
understand and really get into the world of reversing.
If you see or hear reversing anywhere you will most likely see or hear
assembly and debugger as well. Assembly is a low level programming
language that can only do one thing at a time, it’s a bit complicated
but understandable. A debugger is a tool that will show you the assembly
code for an executable file. Think of a network, if you cut the network
cable and look down it, it’s like Wireshark. Now, think of your
computer, open it up and look down the CPU, that’s a debugger, it
shows you what is really happening under everything.
To understand the basics of reversing, we will take a look at a great
challenge for beginners.
Yoire Challenge: Crackme Average
Our task here is to obtain the serial for the executable file.
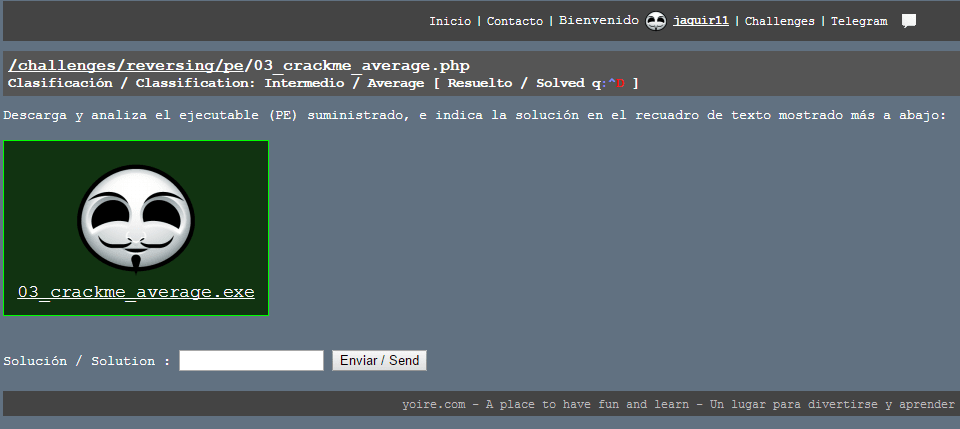
Figure 1. Challenge Crackme Average on yoire.com
To accomplish our task we need a debugger. The debugger we will be using
is OllyDbg. A complete installation guide and user manual can be
found at the official OllyDbg website. Keep in
mind that Olly cannot be used to reverse all executable files, it
focuses on binary code analysis. As you run into more difficult
reversing challenges, you will learn to use other tools either to
complement Olly or to substitute it.
The first thing we need to do is understand what the executable file was
made to do. To do this, download the .exe file on the challenge
website.
It’s a good practice to keep a virtual machine to run the executable
files, since you don’t know what they do, the safe bet is to open it and
run it in a controlled environment. If you really trust the source of
the file, you can run it on your local machine at your own risk.
Once we run the executable, we can see that it prompts us for a serial
and gives us two options: Check serial or close. In order to understand
what the program does we will just enter any serial and check it.
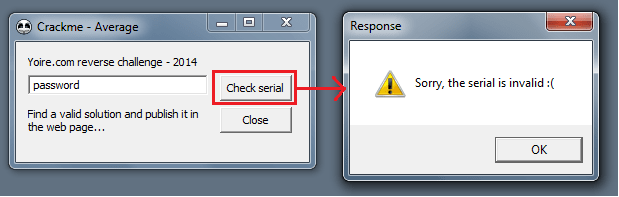
Figure 2. Result after checking an incorrect serial
After we enter an incorrect serial we get the following message: “Sorry
the serial is invalid. :(“. You might think this doesn’t help us at all
but in fact it gives us the starting point we need.
Let’s open the executable file in Olly and check out if assembly is
as difficult as they say.

Figure 3. exe file on OllyDbg
Once the file loads, we can see that we have the registers on the top
right, the stack on the bottom right, the hex dump on the bottom left
and the main debugging screen on the top left. The “$” symbol shows us
the entry point of the program. In the registers we see "EIP" which
tells us what instruction is about to happen. Think of it as a work
bench, if you want to work with something you need to push it onto the
bench.
In all the mess of instructions, where should I look? Well, we know the
program asks the user for input, it then checks the input against a
valid serial and finally displays a message depending on the correctness
of the serial. So, if we find where it displays the message we can look
backwards and try to find where it compares the input with the correct
serial. Olly has a great feature for this, right-click on the main
screen, “Search for” – “All referenced text strings”.

Figure 4. Search for all referenced text strings
A new window pops up with the results. The window contains all the
strings that are referenced in the program. Here we can see the message
we set as our starting point and also the message that is displayed when
we enter the correct serial.
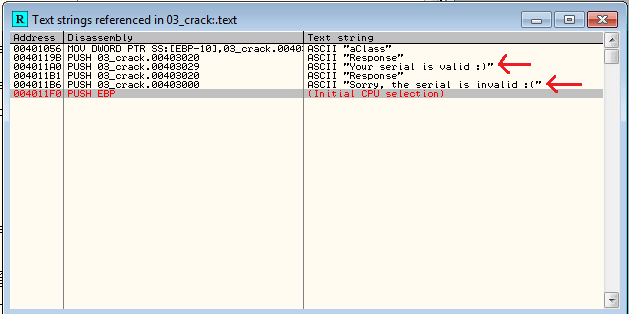
Figure 5. Search for all referenced text strings
Debugging pretty much consists on setting breakpoints where we think are
needed and analysing the execution of the program before, during and
after the breakpoints. So let’s do this.
Click on the error message we saw before and hit enter, this will take
you to the location of the string reference in the assembly code. From
here we need to scroll up carefully and try to understand what’s
happening. We see a lot of CMP immediately followed by a JNZ. This
is important because CMP compares two values and JNZ jumps based on
the result of that comparison. JNZ will jump if the two values
compared are not equal. If we keep scrolling up, we see a function call
in red “GetDigItemText”. Bingo! This is a function that retrieves the
text associated with a control. In our case the input we provided in the
control box. The program can then check the correctness of the input.
With time you need to learn to identify these key functions, they allow
you to set breakpoint where they need to be set and obtain valuable
information that will allow you to crack the exe. We will go ahead and
set a break point in that function.

Figure 6. Setting breakpoints
With the breakpoint set, we can hit F9 to run the program until it
reaches the breakpoint. The program will halt at the GetDigItemText
instruction and wait for your instruction. What we are really interested
in are all the comparisons it does immediately after. If we hit F8 to
step over the instructions and keep an eye out for what it compares
against, in the first CMP we can see that it compares my first char
‘p’ with the hex 63.

Figure 7. Check out the CMP!!
After the comparison we can note that the JNZ is taken. Since the two
values compared are not equal, JNZ is executed. After the jump the
program gives us the invalid serial message and exits. Before we try
another password let’s understand what the program is performing all the
comparisons against.

Figure 8. All the comparisons
We have the hex values: 63, 68, 61, 72, 62, 79, 63, 68, 61, 72. And note
that if the last jump is not taken then we will land in the correct
serial portion of the code. Now all we need to do is pull out our handy
ascii table and figure out the serial.
‘c”h”a”r”b”y”c”h”a”r’ we have our answer. Let’s test it out.

Figure 9. Correct serial – Cracked!!
There we have it. Our first reversing!
Technology advances in a very fast manner and with it grows the
complexity of reversing. Everyday more vulnerabilities are reported and
patched, developers find new methods of packaging their solutions and
new tools come out that are meant to make reversing near impossible. You
have to stay on top of it, read in order to gain new knowledge and
practice in order to apply and modify that knowledge based on real life
reversing situations.
*** This is a Security Bloggers Network syndicated blog from Fluid Attacks RSS Feed authored by Juan Aguirre. Read the original post at: https://fluidattacks.com/blog/reversing-mortals/
